
This how-to assumes you have FIU Canva Enterprise, a paid tier of Canva available to all colleges and units. You can learn more about FIU Canva Enterprise memberships on FIU's Brand website.
Request an FIU Canva Enterprise membership
Getting Started: Creating a new design in Canva
Once you are logged in to Canva, open a new design file. Select “Create a design” in the top-right corner of the screen.
You will need to determine the appropriate file size for your new design.

Before we start creating the sticker, it’s best to know which photo you want to create the sticker from. Remember, you can download free-use FIU photos from FIU’s Flickr account.
Once you’ve picked your photo, let’s upload it to Canva.
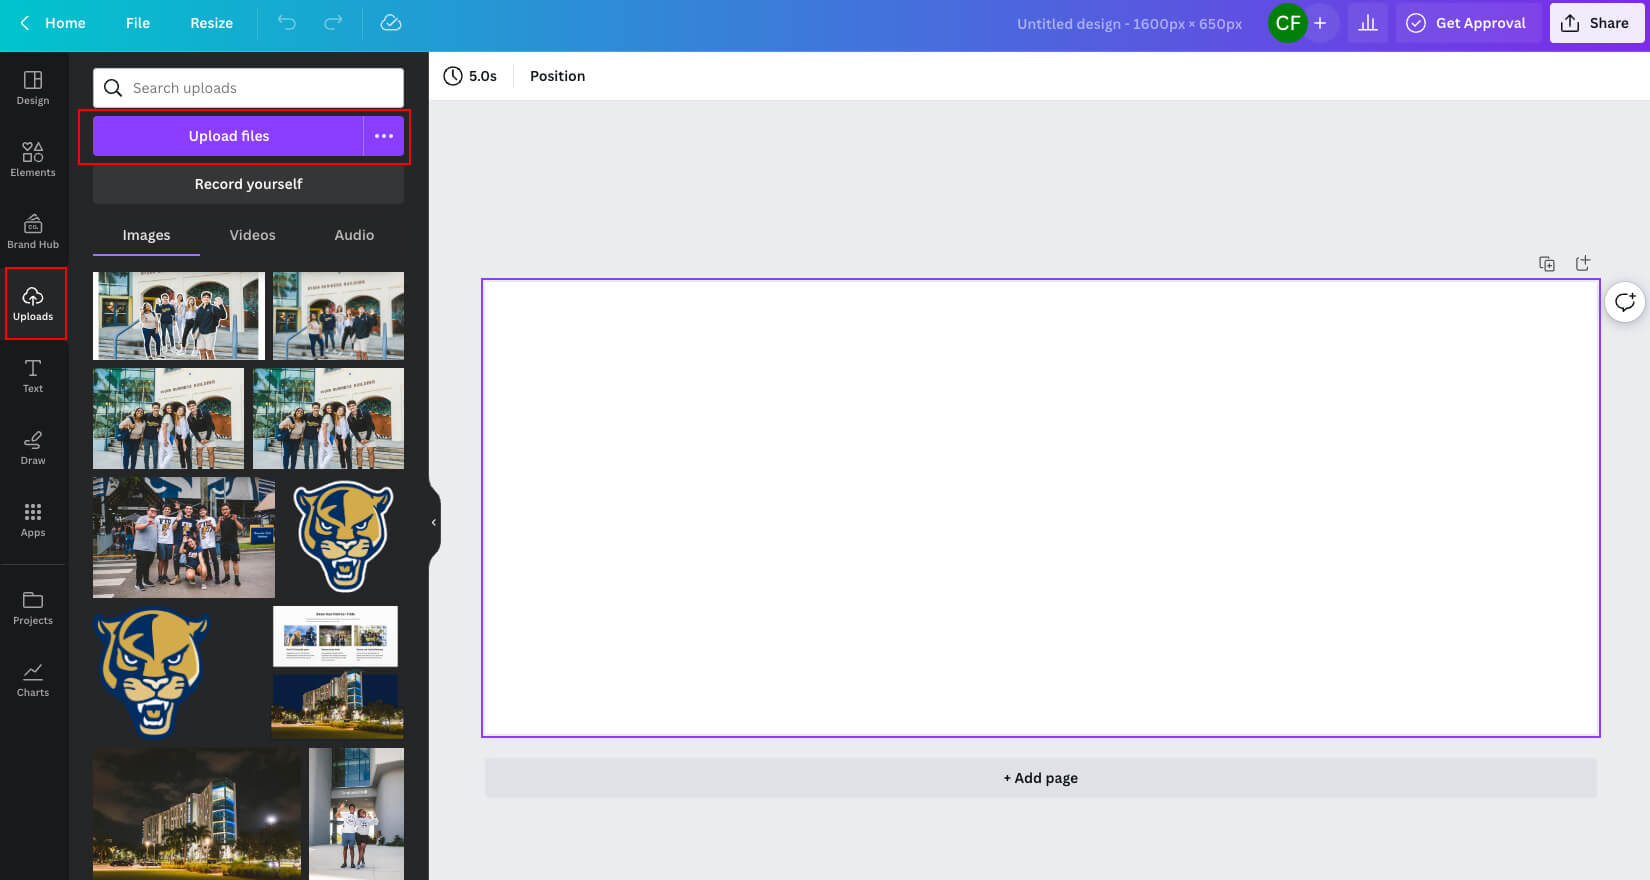
Uploading a photo in Canva
Select the “Uploads” tab on the left side of the screen. Then, select the button, “Upload files.” Choose the photo you want to upload.
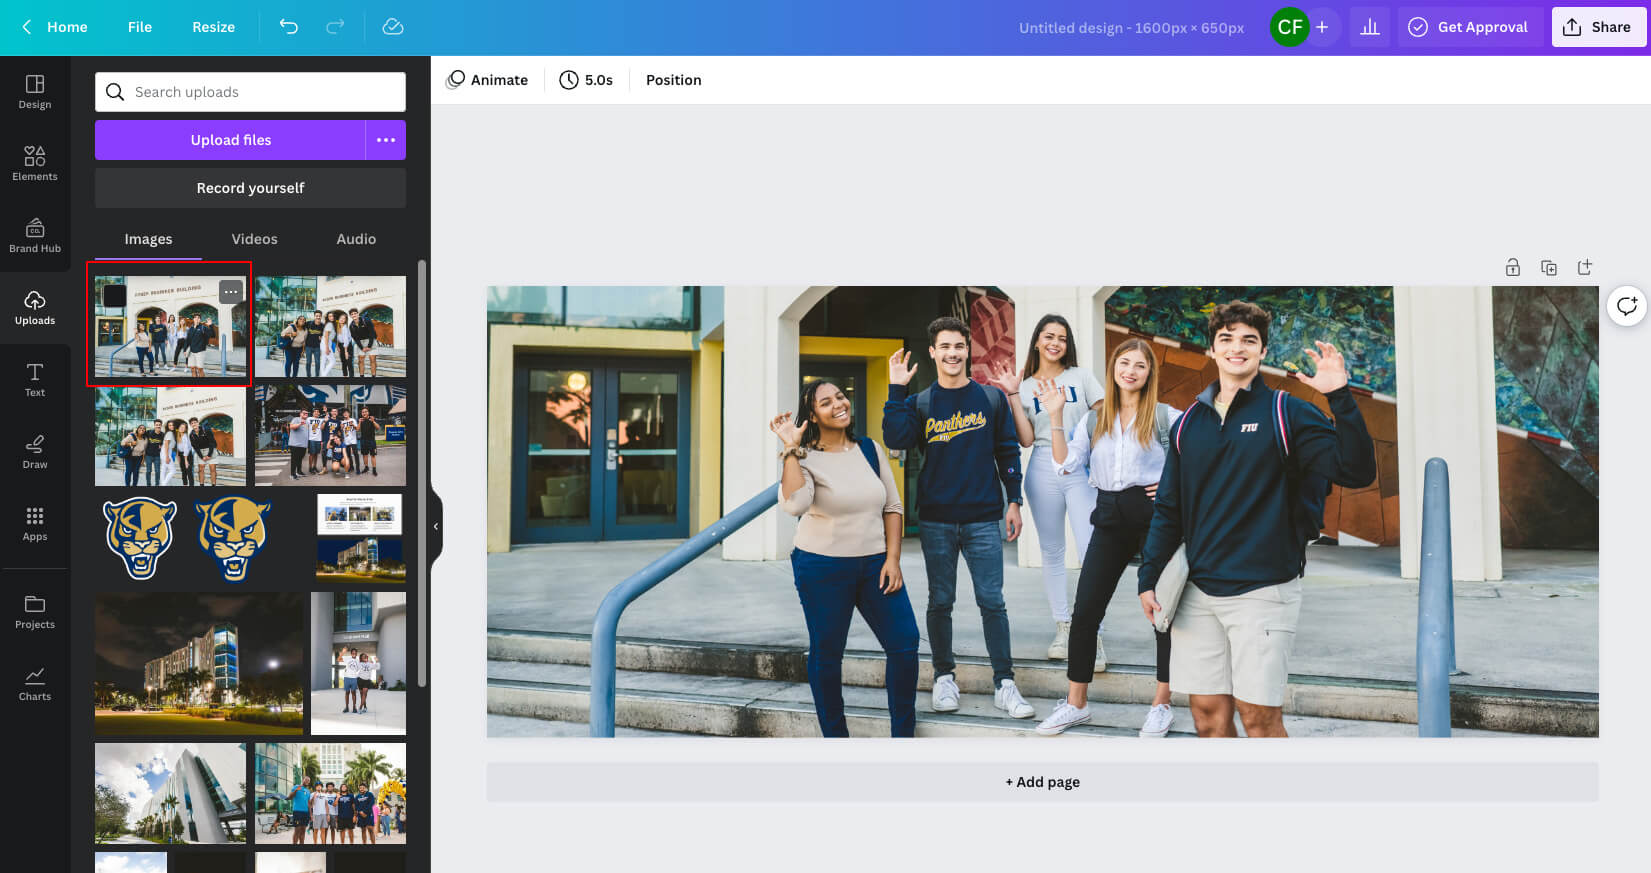
Adding a photo to your artboard
Select your photo from the media gallery and drag it onto the artboard on the right side of the screen. Adjust your photo to fit in the artboard.
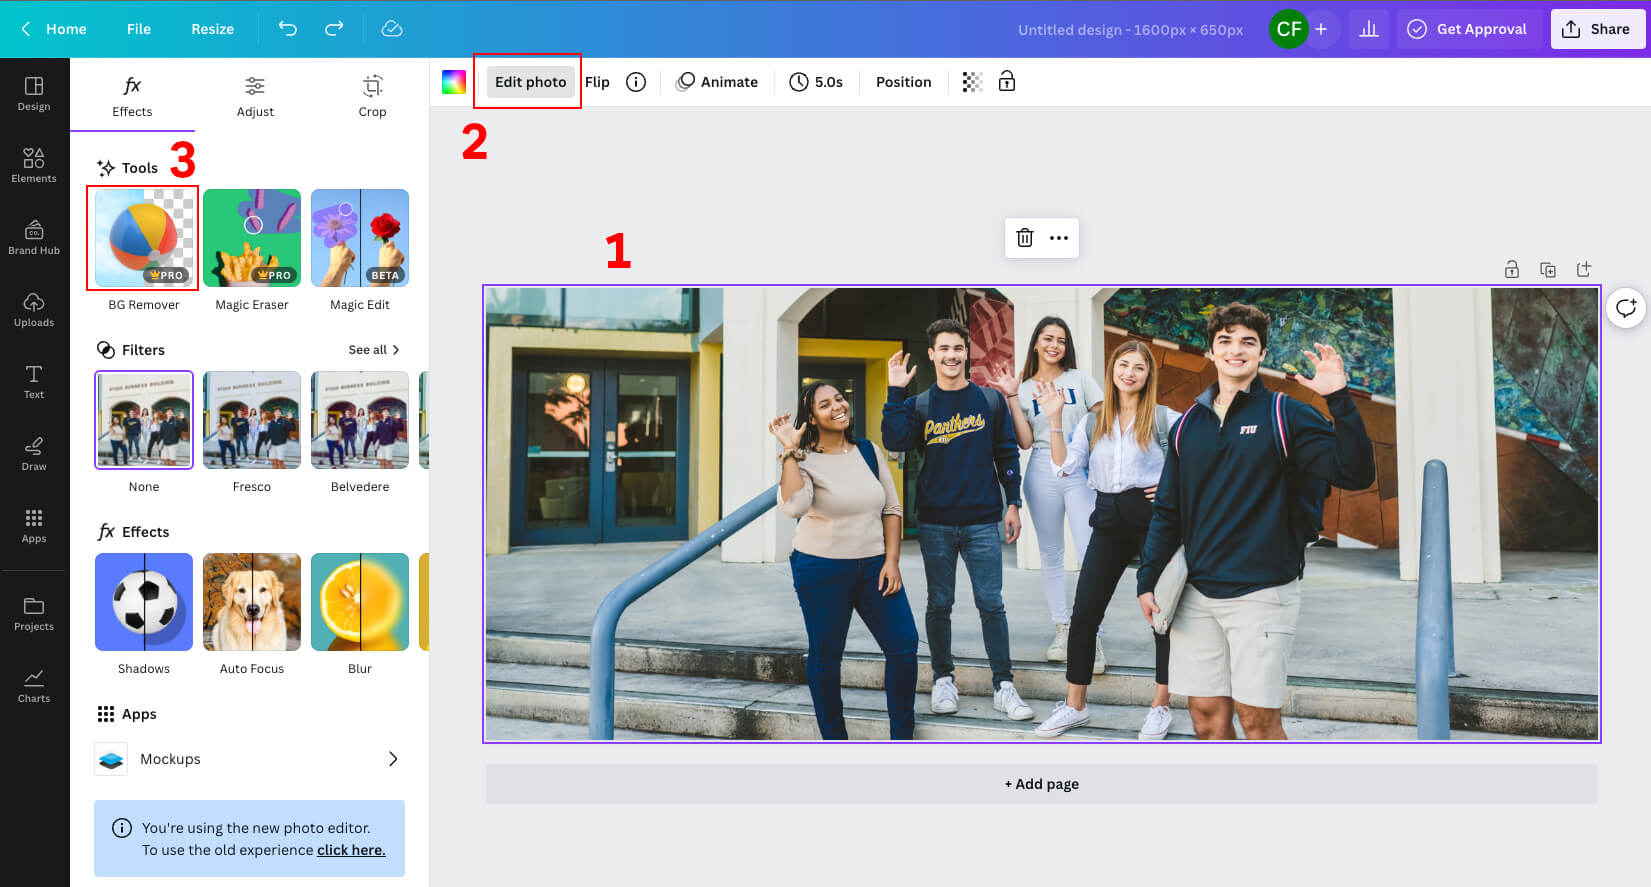
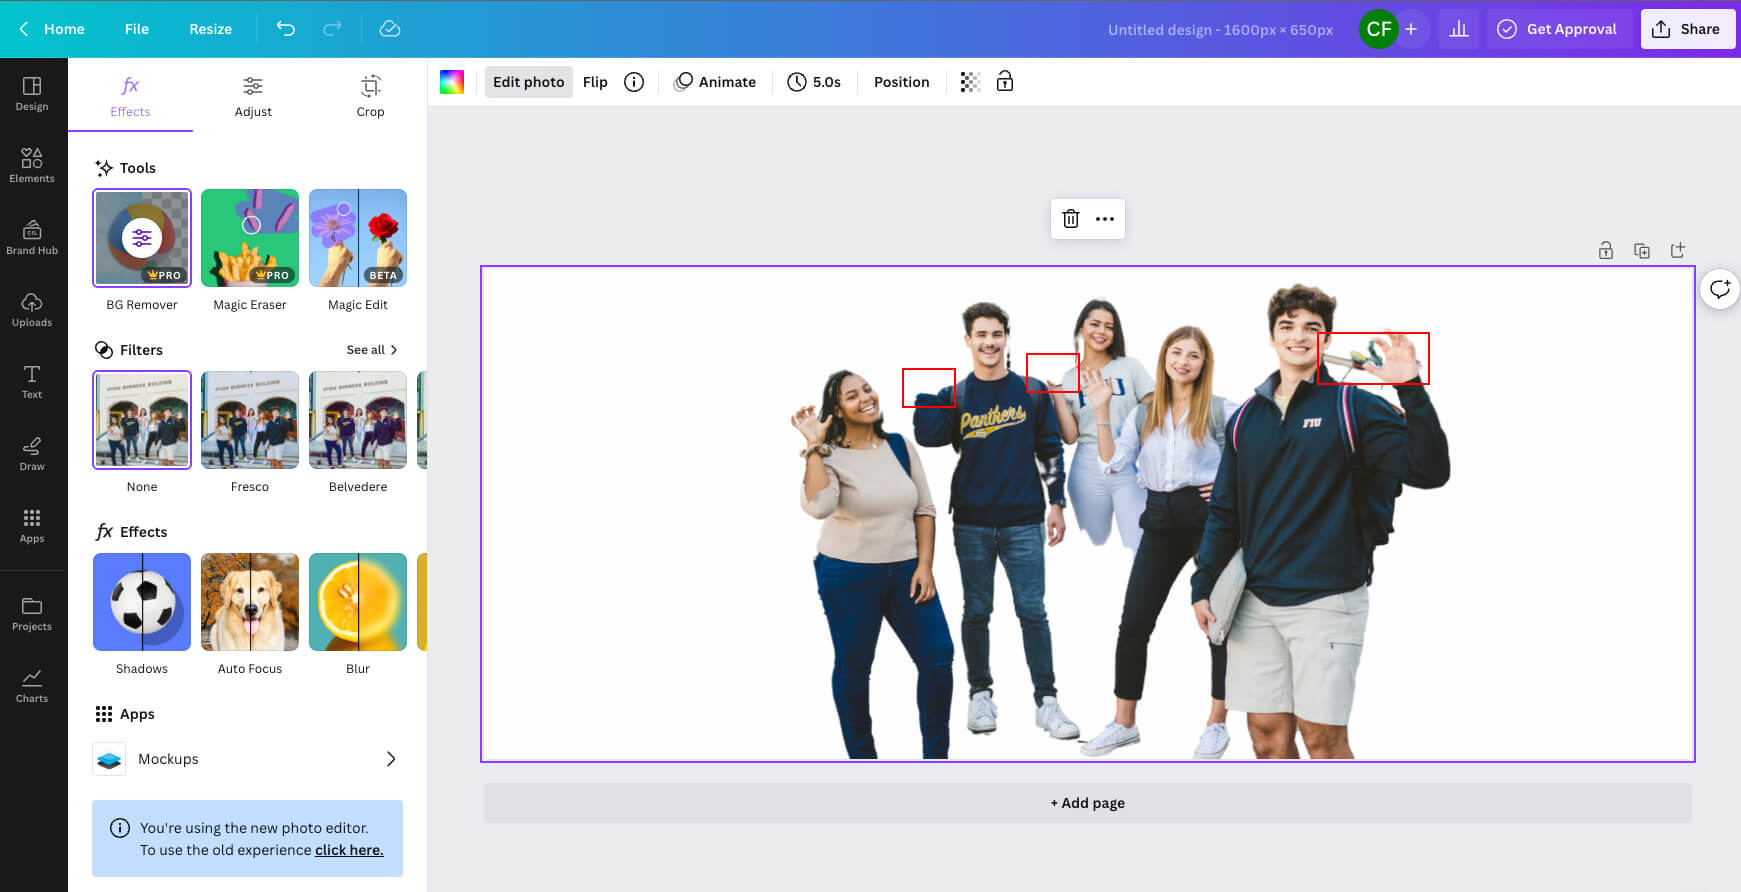
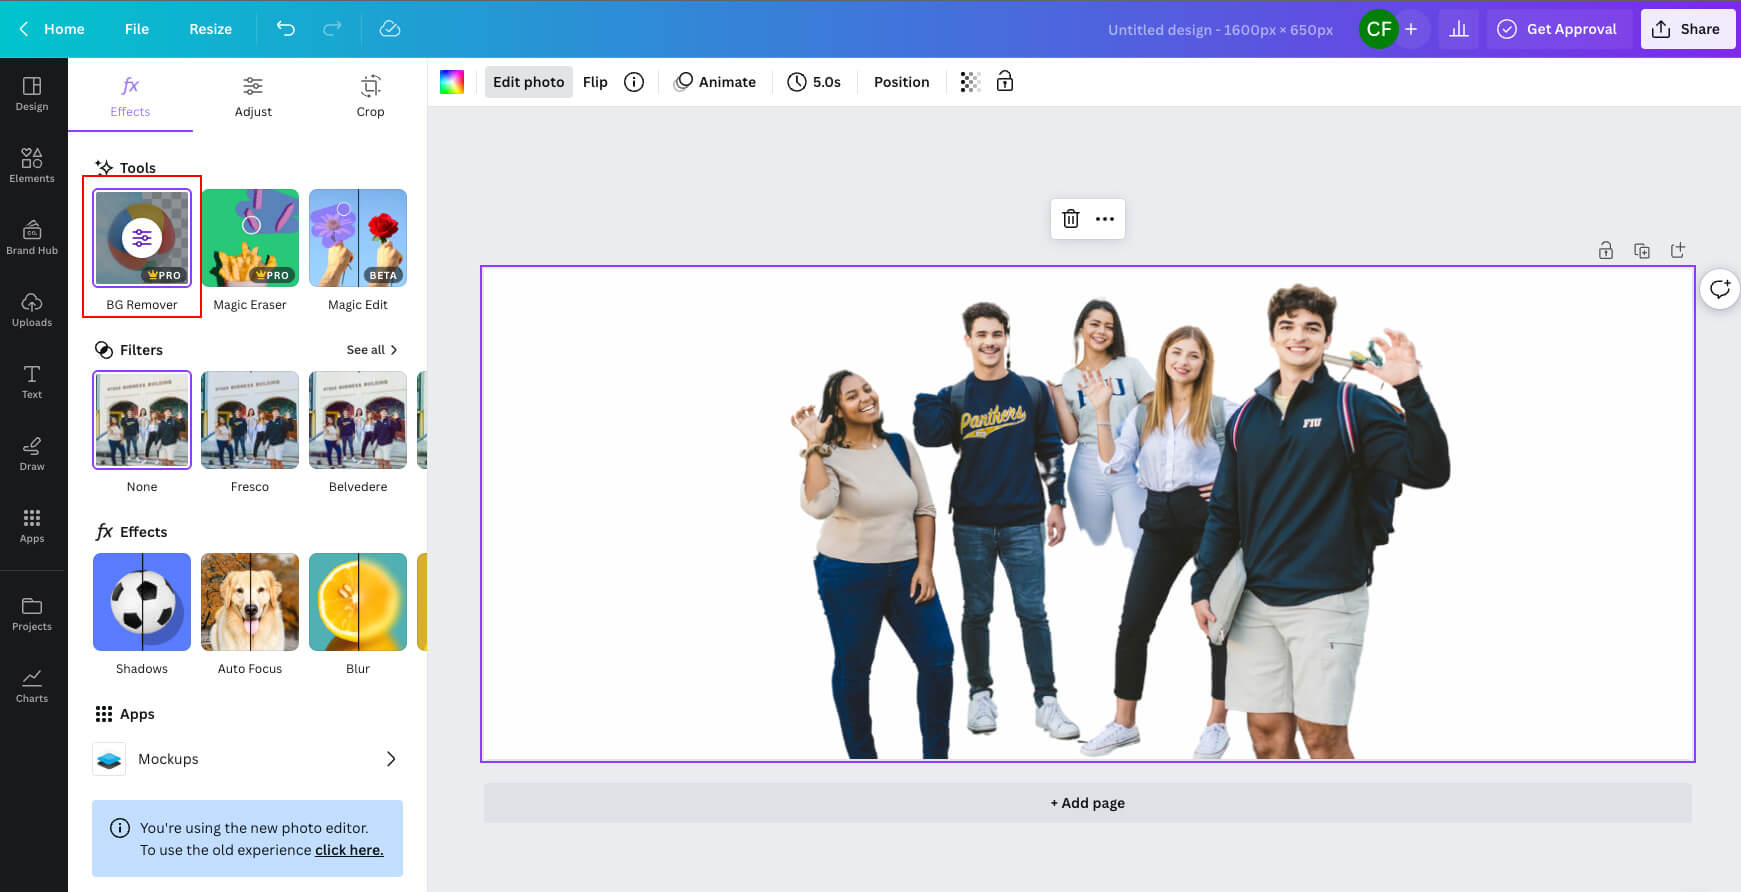
Removing the background from your photo
- Select your photo in the artboard.
- Click “Edit photo” on the toolbar just above the artboard.
- Select “BG Remover” on the toolbar to the left of the photo.
Once the background has been removed from the image you may notice the BG Remover removed too much of the image or parts of the background did not get removed at all.
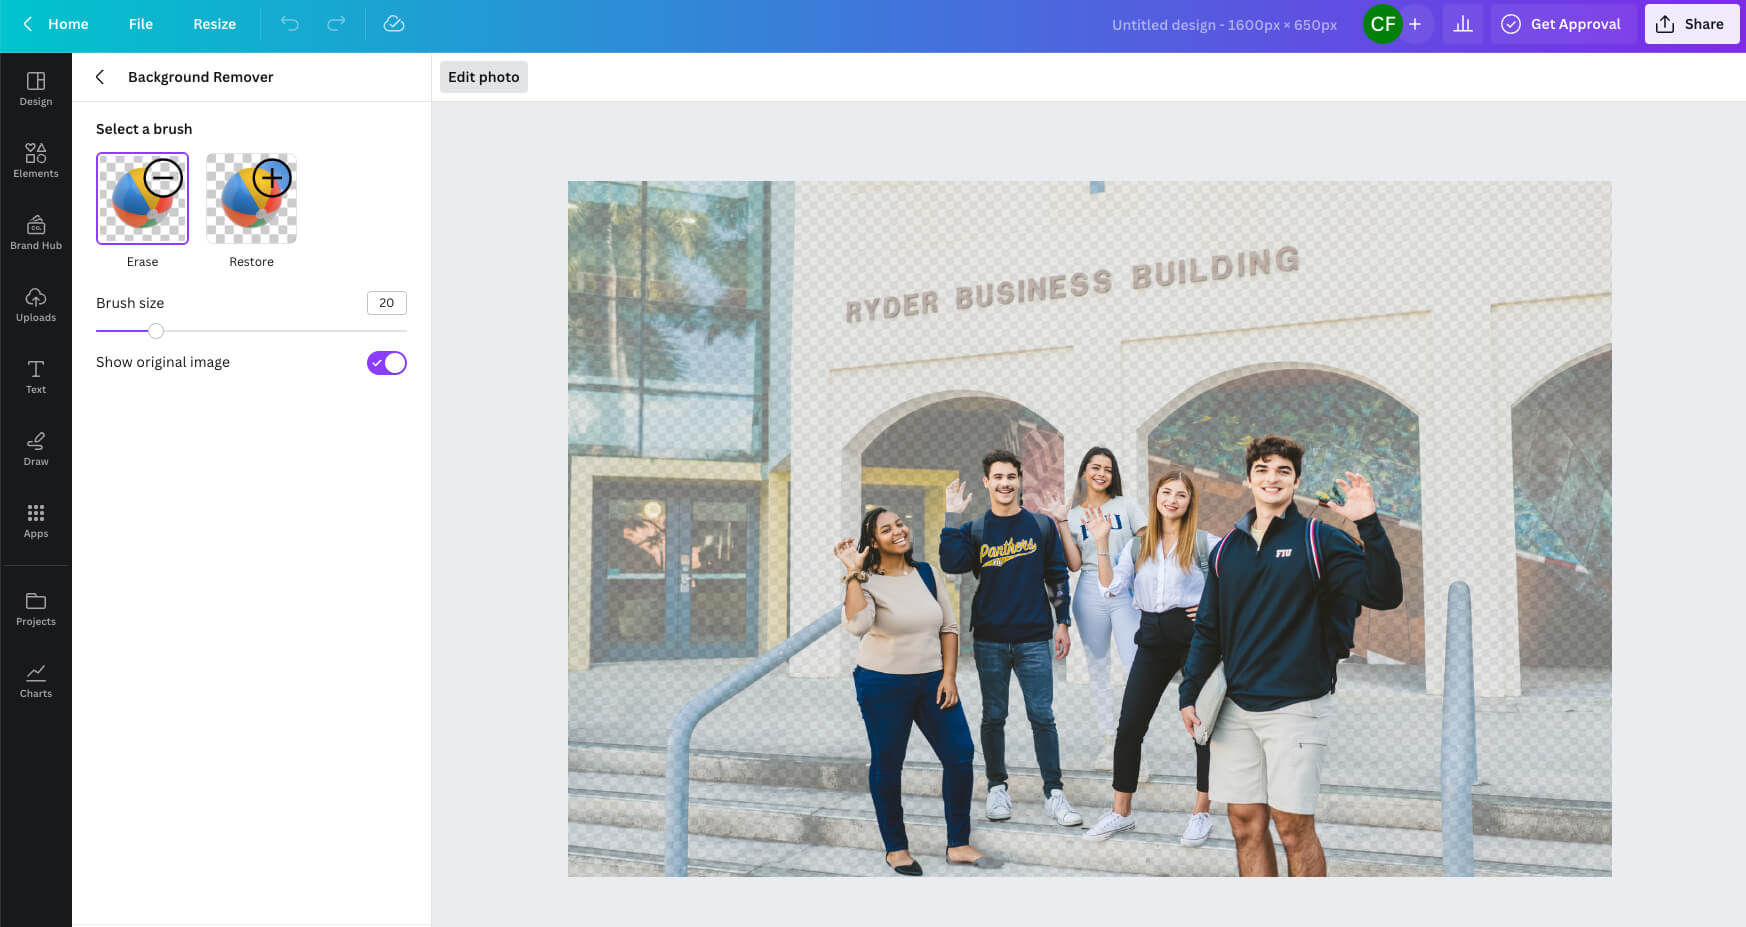
Using the advanced options in the BG Remover
The advanced options in the BG Remover will allow you to restore parts of the background that were removed or erase any remaining parts of the background.
- To erase or restore parts of the image, click on the advanced options icon on the BG Remover.
- Erase or restore parts of the image using the options in the toolbar on the left side of the photo.
- Adjust the brush size to make the brush smaller or larger.
- Toggle to show the original image so you can see what’s missing or what needs to be removed.
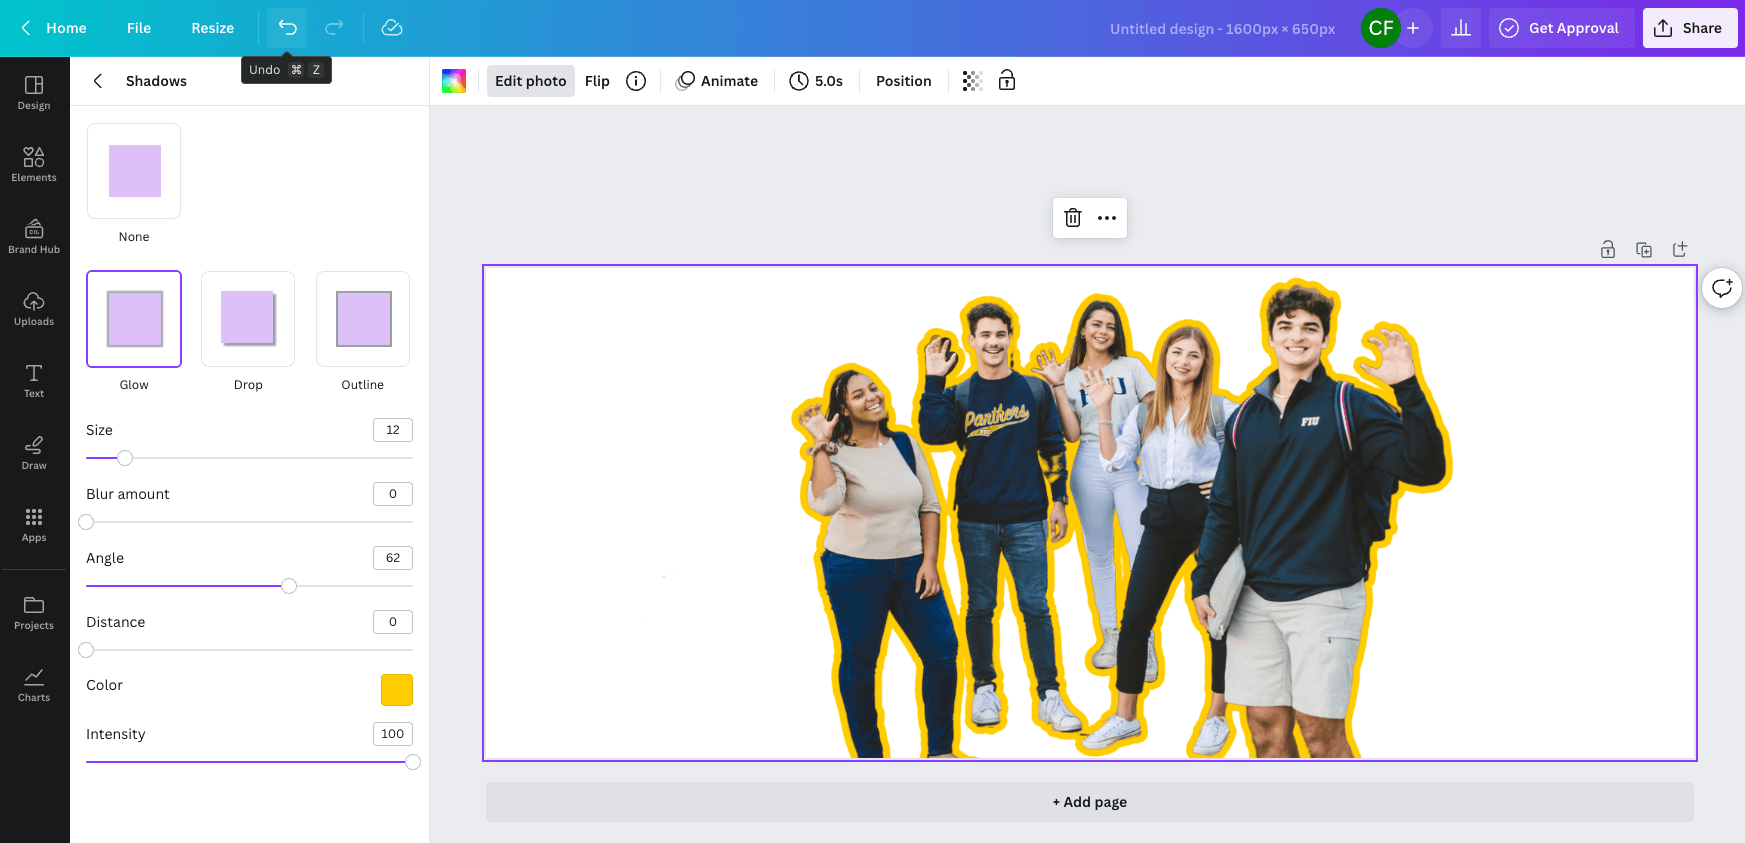
Creating the sticker effect
After we’re done removing the background from our image, we’ll be adding the “sticker effect.”
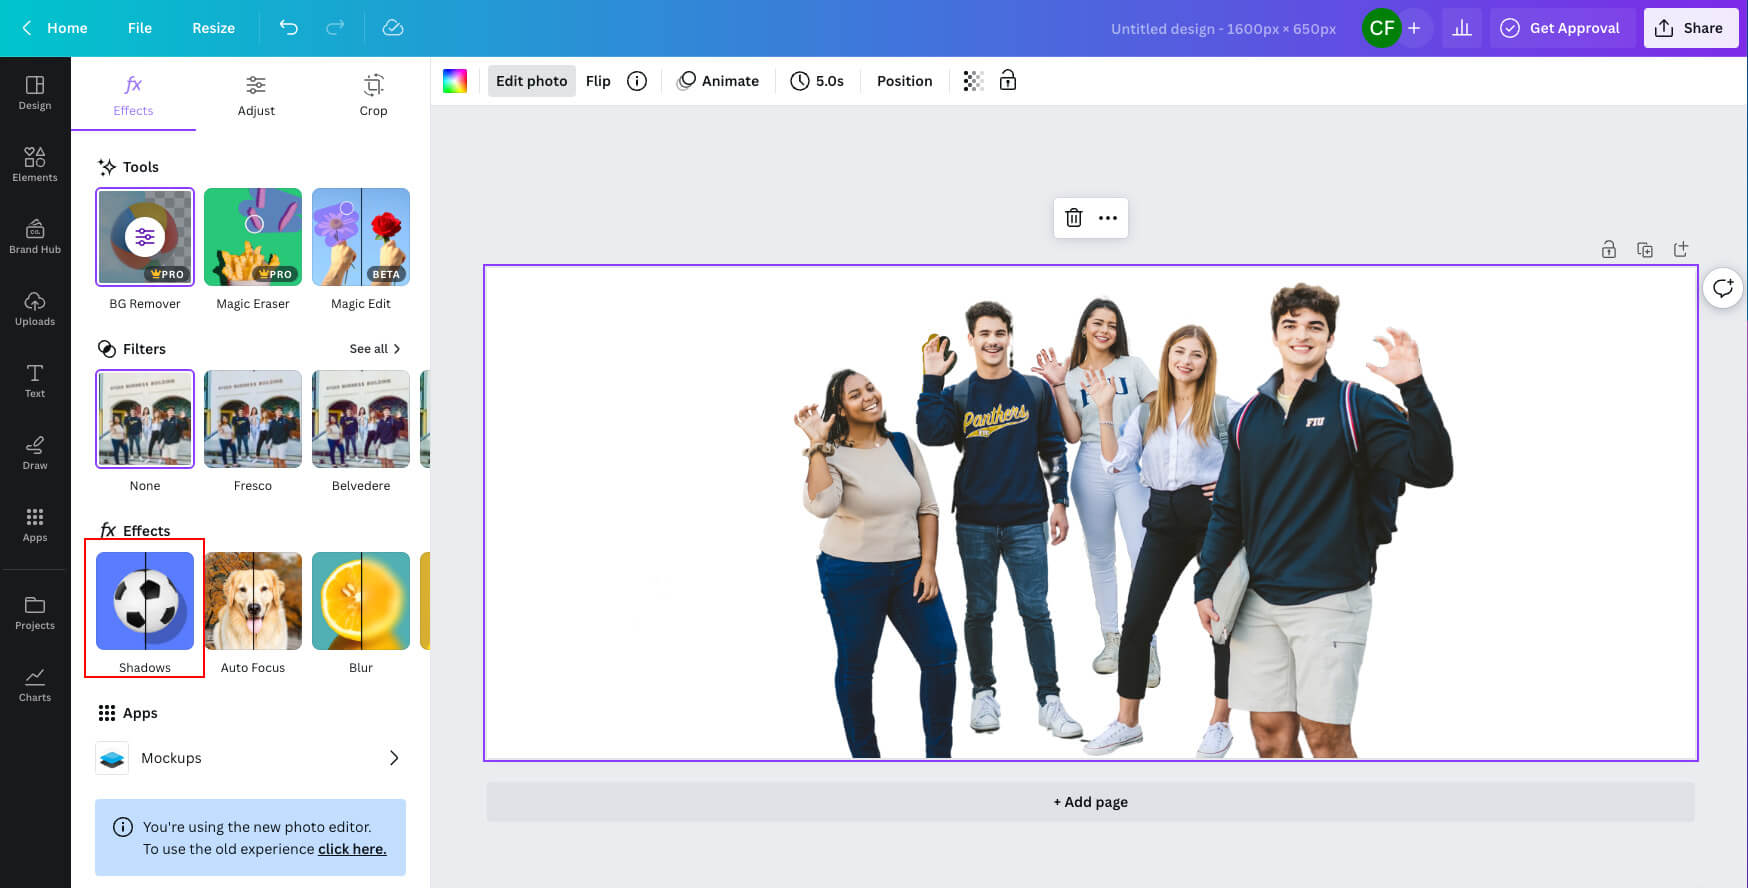
- On the toolbar on the left side of the photo, click on “Shadows” under FX Effects.
- Select the “Glow” option.
- Adjust the fields as follows:
- Size: 12 (this can be anywhere between 8 and 15)
- Blur amount: 0
- Angle: 62
- Distance: 0
- Color: use any of the FIU Brand colors
- FIU Blue: #081E3F
- Bright Gold: #FFCC00
- Magenta: #CC0066
- Cyan: #00FFFF
- White: #FFFFFF
- Intensity: 100
Now that we’ve created the sticker you can export your sticker as a PNG with a transparent background, paste the sticker on a solid background color, paste the sticker on top of the original photo or paste the sticker on top of another photo.
The possibilities are endless. Have fun!