Blog posts in Cascade appear in reverse chronological order — the newest posts show up first. But with the sticky post feature, you can pin any post to the top page of the page, regardless of when it was published.
Sticky posts are great for highlighting a featured event, important news or an announcement. You can keep a post pinned to the top of your blog for as long as you need.
You can have multiple sticky posts, but we recommend sticking to just one.
Create a sticky post
Marking a post as sticky is easy. Just use the Select Sticky Post option in the edit window on your blog’s overview page.
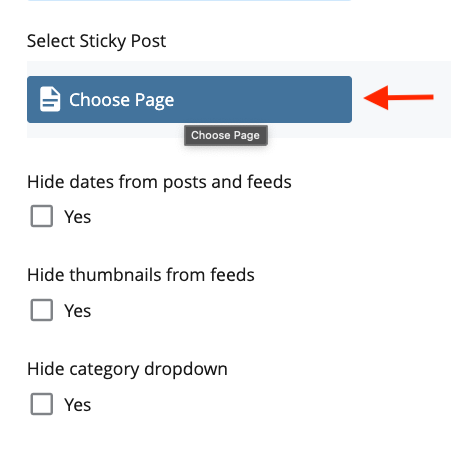
Step 1
Click Choose Page under the Select Sticky Post option.
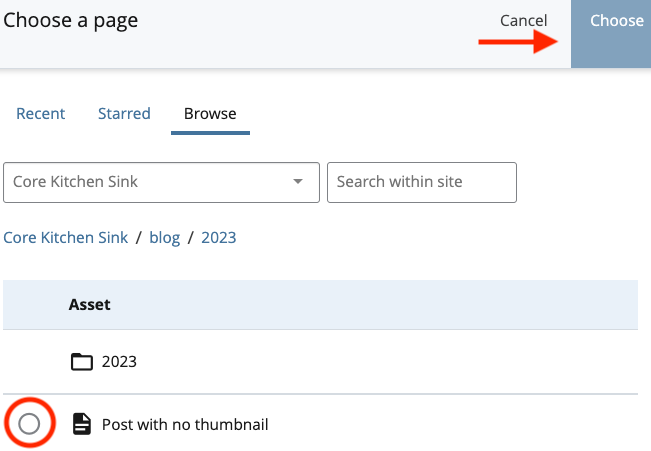
Step 2
Select which blog post to mark as sticky, then click choose. You can add more than one sticky post by clicking the green plus sign under the Select Sticky Post field.
After marking your posts as sticky, preview the draft, then click Submit and Publish.
Whether you're sharing a big update or keeping an important reminder front and center, sticky posts help you make sure the right content stays in the spotlight.
Interested in a blog?
It’s a great way to highlight news, share web updates or keep your audience current with your department. If you have any questions or want to set up your own blog, reach out to us at digimaint@fiu.edu.