

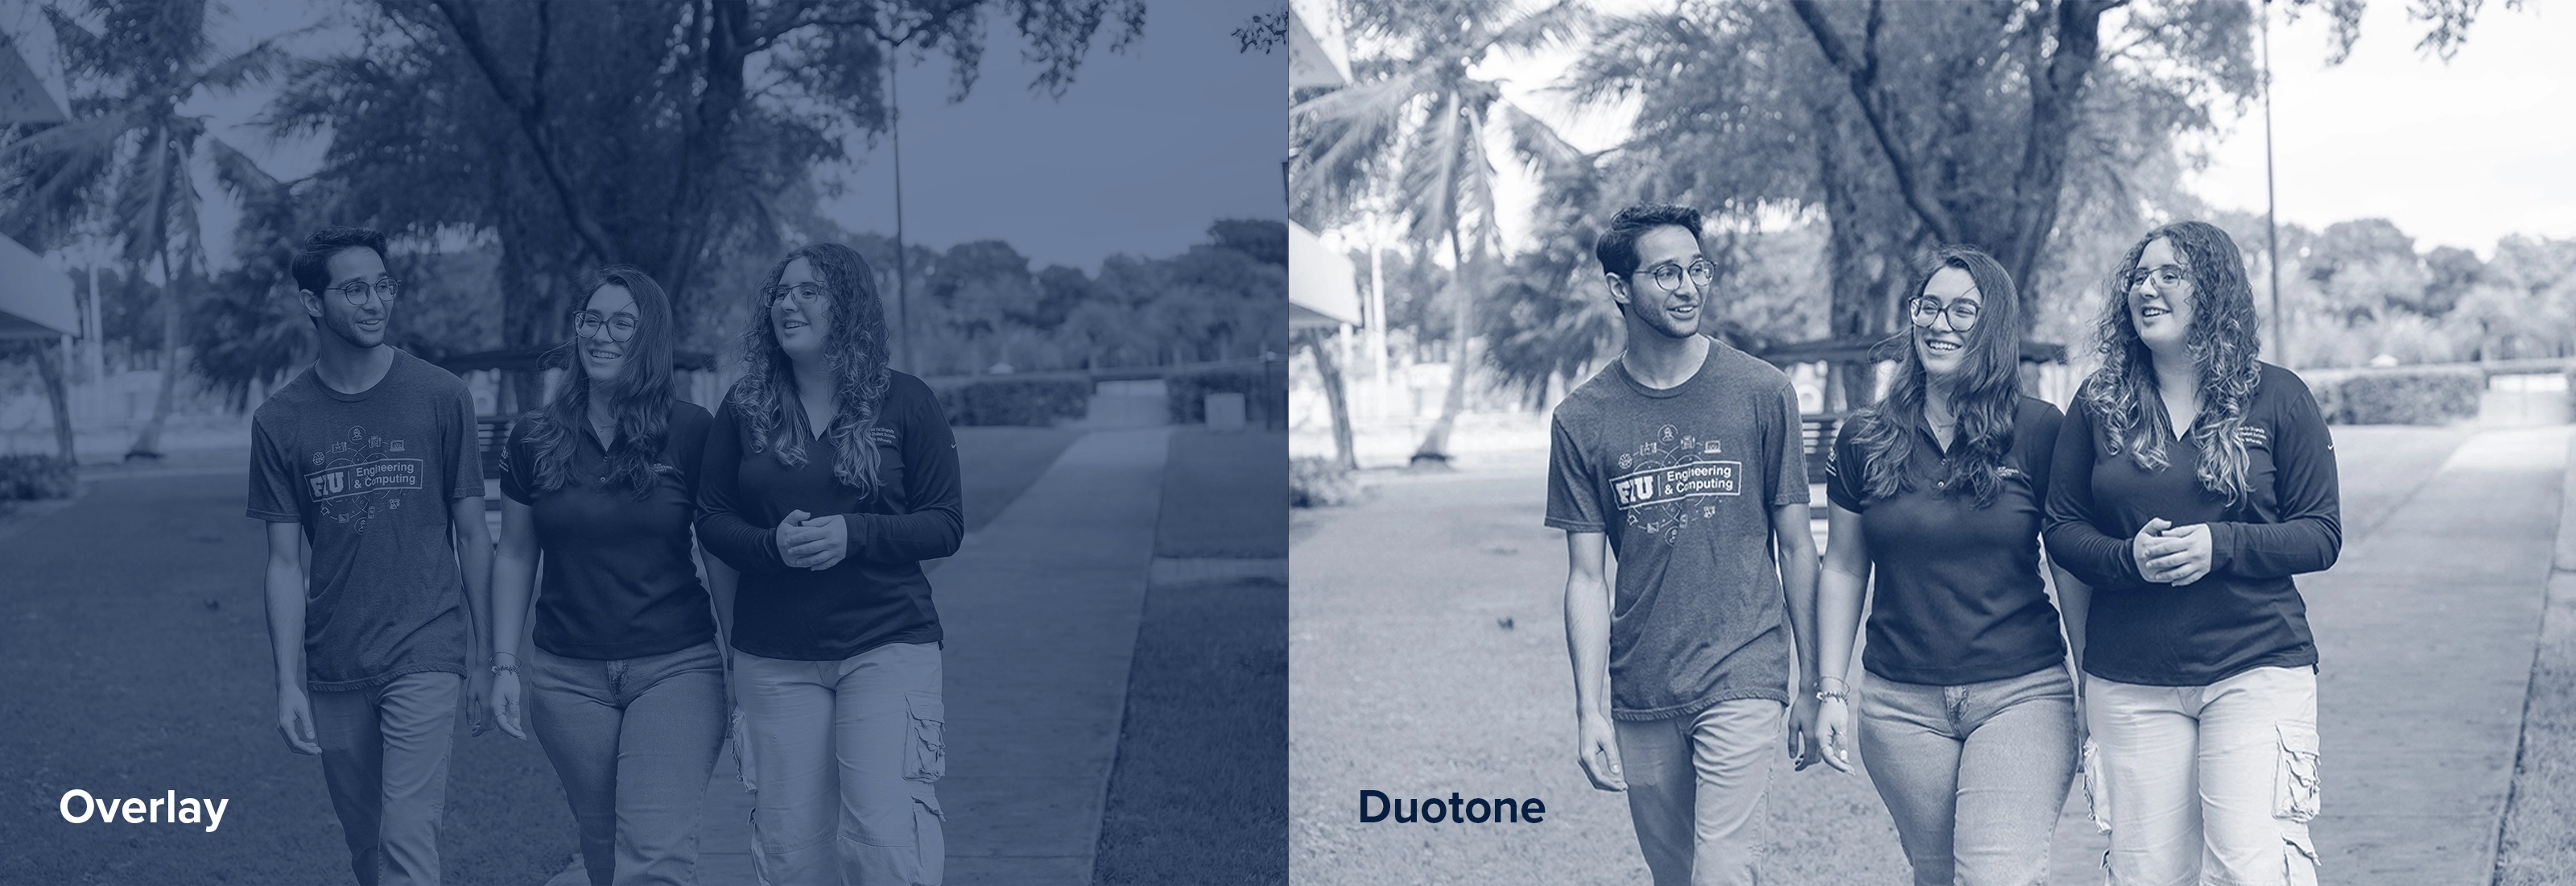
If you're looking to produce a strong web banner, social image or graphic that focuses on the text without giving up visual detail, a duotone image could be a good approach.
What is a duotone image?
A duotone image is a reproduction of an image in grayscale that is recolored with two contrasting variants of similar colors. As opposed to an overlay, which simply covers the image with a shade of color.
How to create a duotone image in Photoshop
Step 1
Find the correct image that corresponds to the subject matter you need. Great photos include images of students, faculty and facilities.
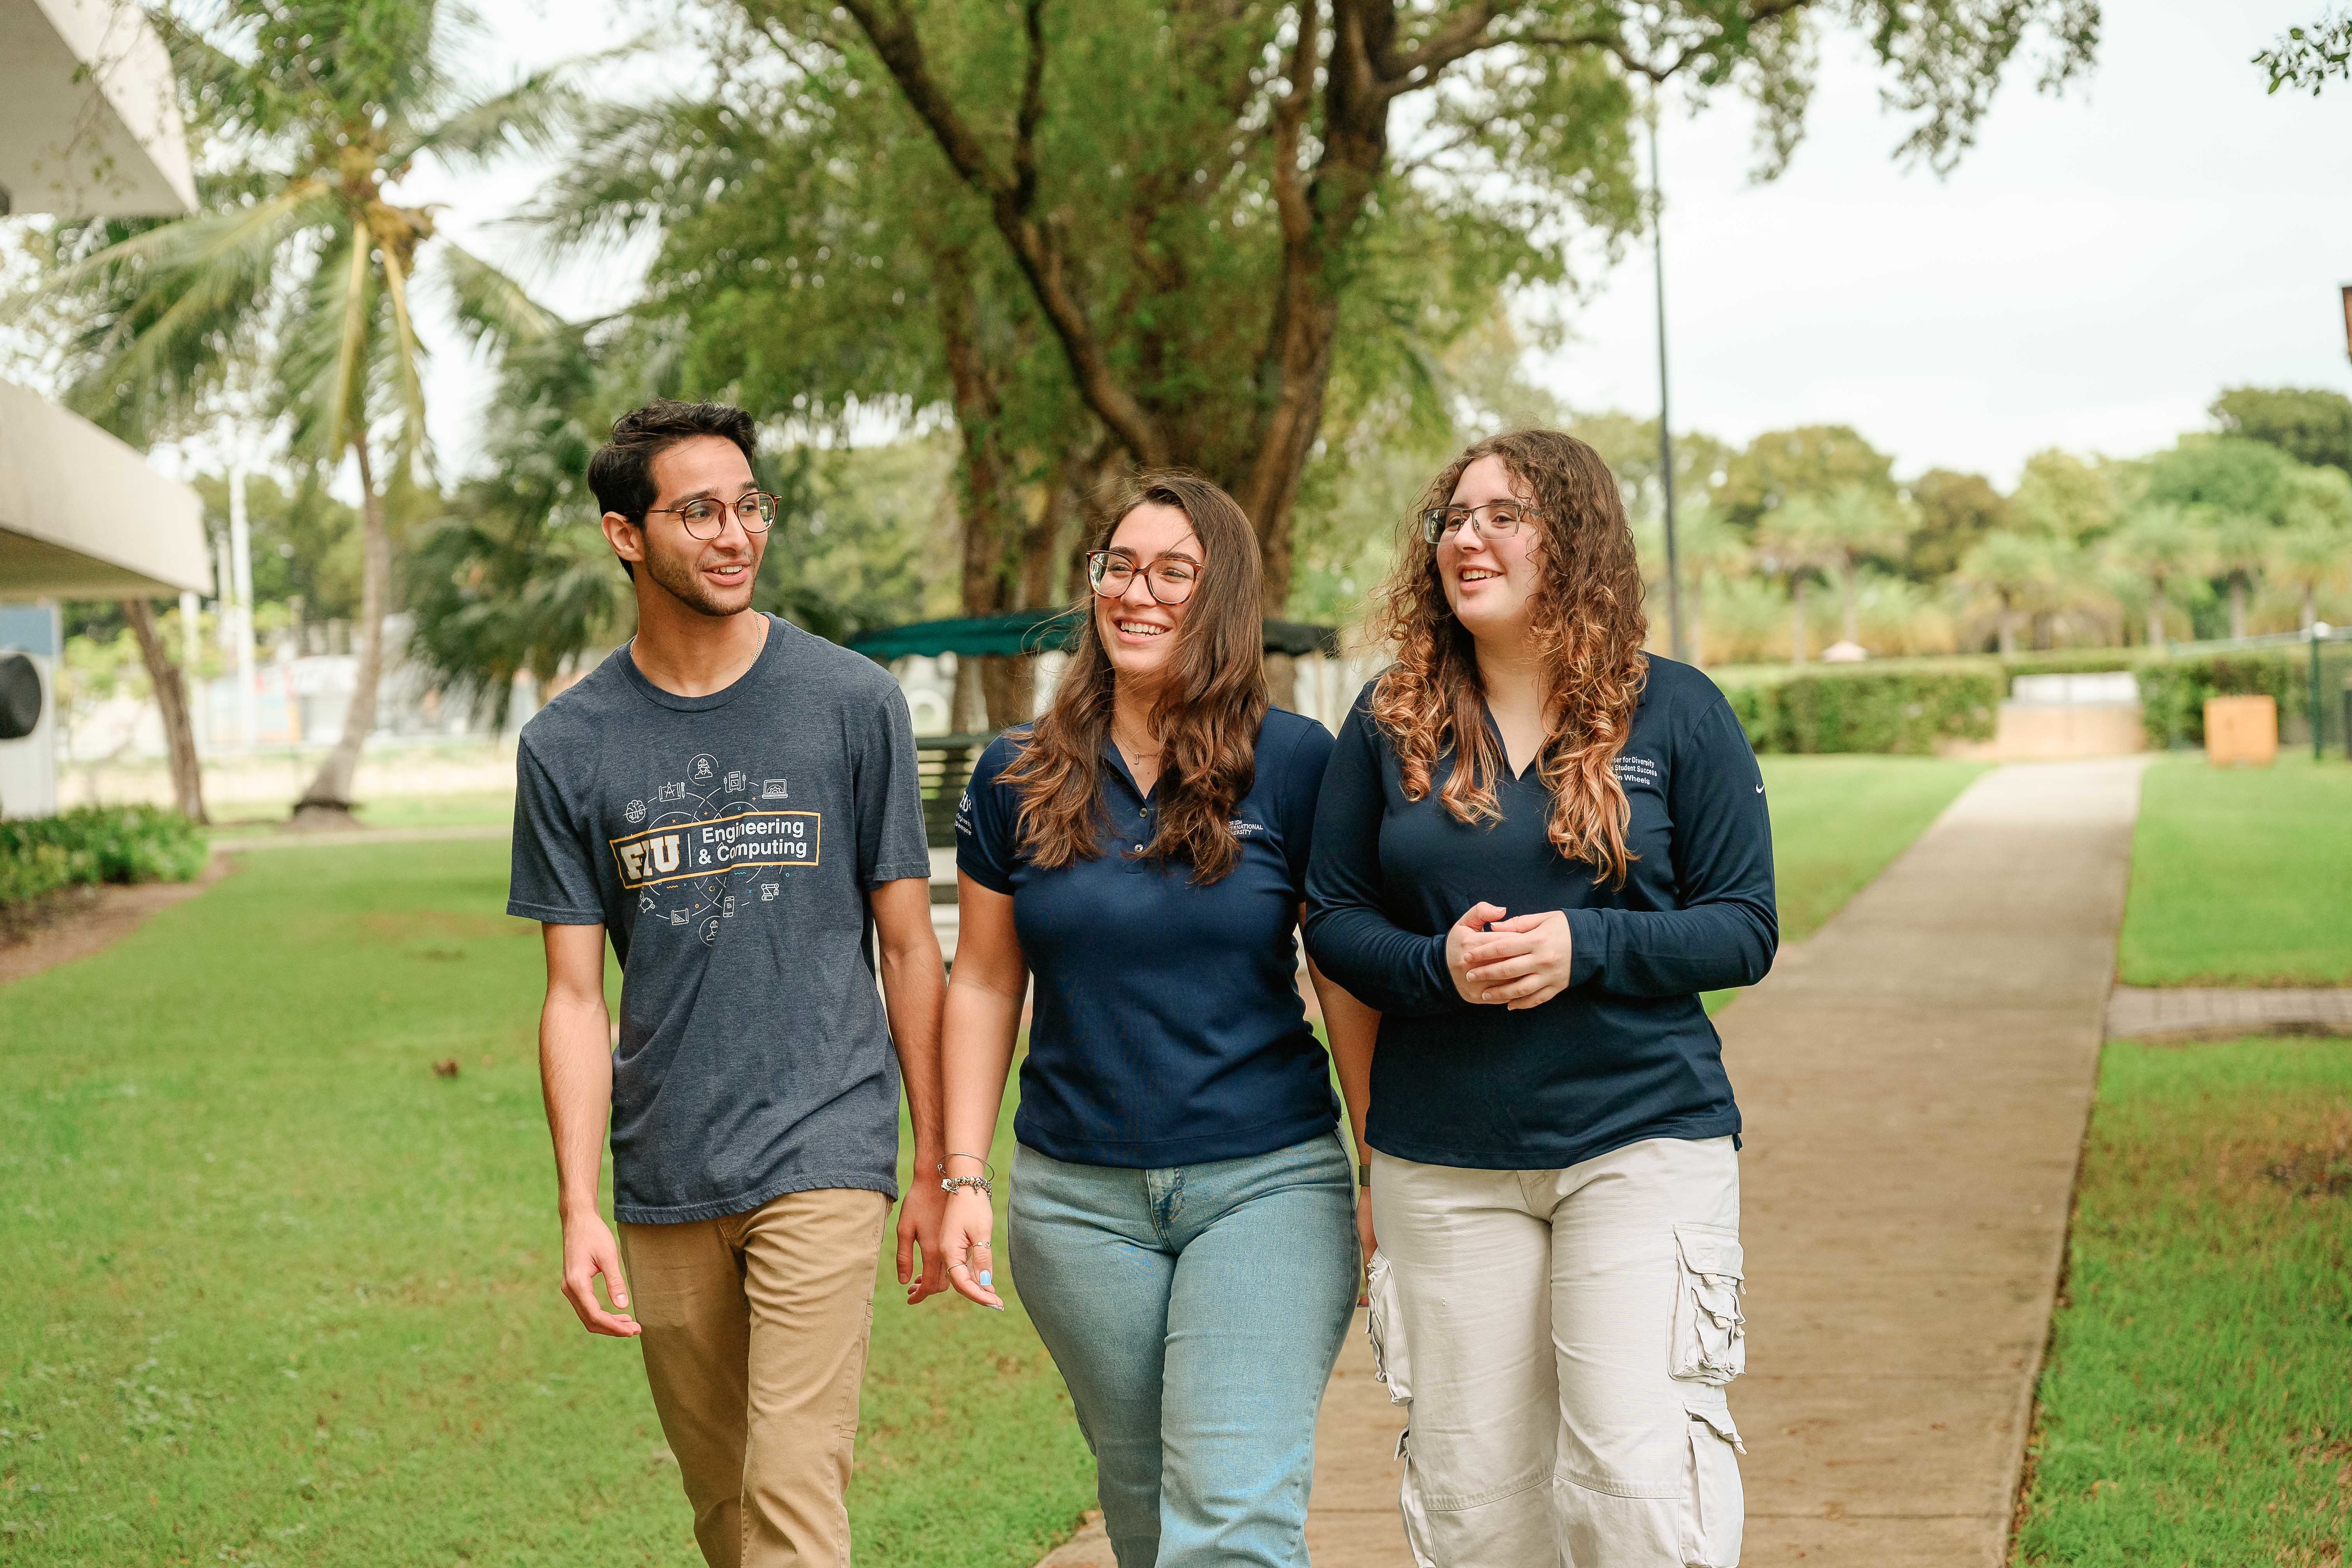
Next, choose two colors (typically FIU colors). You'll use one color for darks and the other for lights. This will create a dynamic high-contrast image. FIU Blue (HEX: #081E3F) and White (HEX: #FFFFFF).
The key is selecting your highlights and shadows and coloring them separately.
In this tutorial, we'll focus on Photoshop, but Canva is also an option.
Step 2
Open your image in Photoshop. Go to Window > Channels.
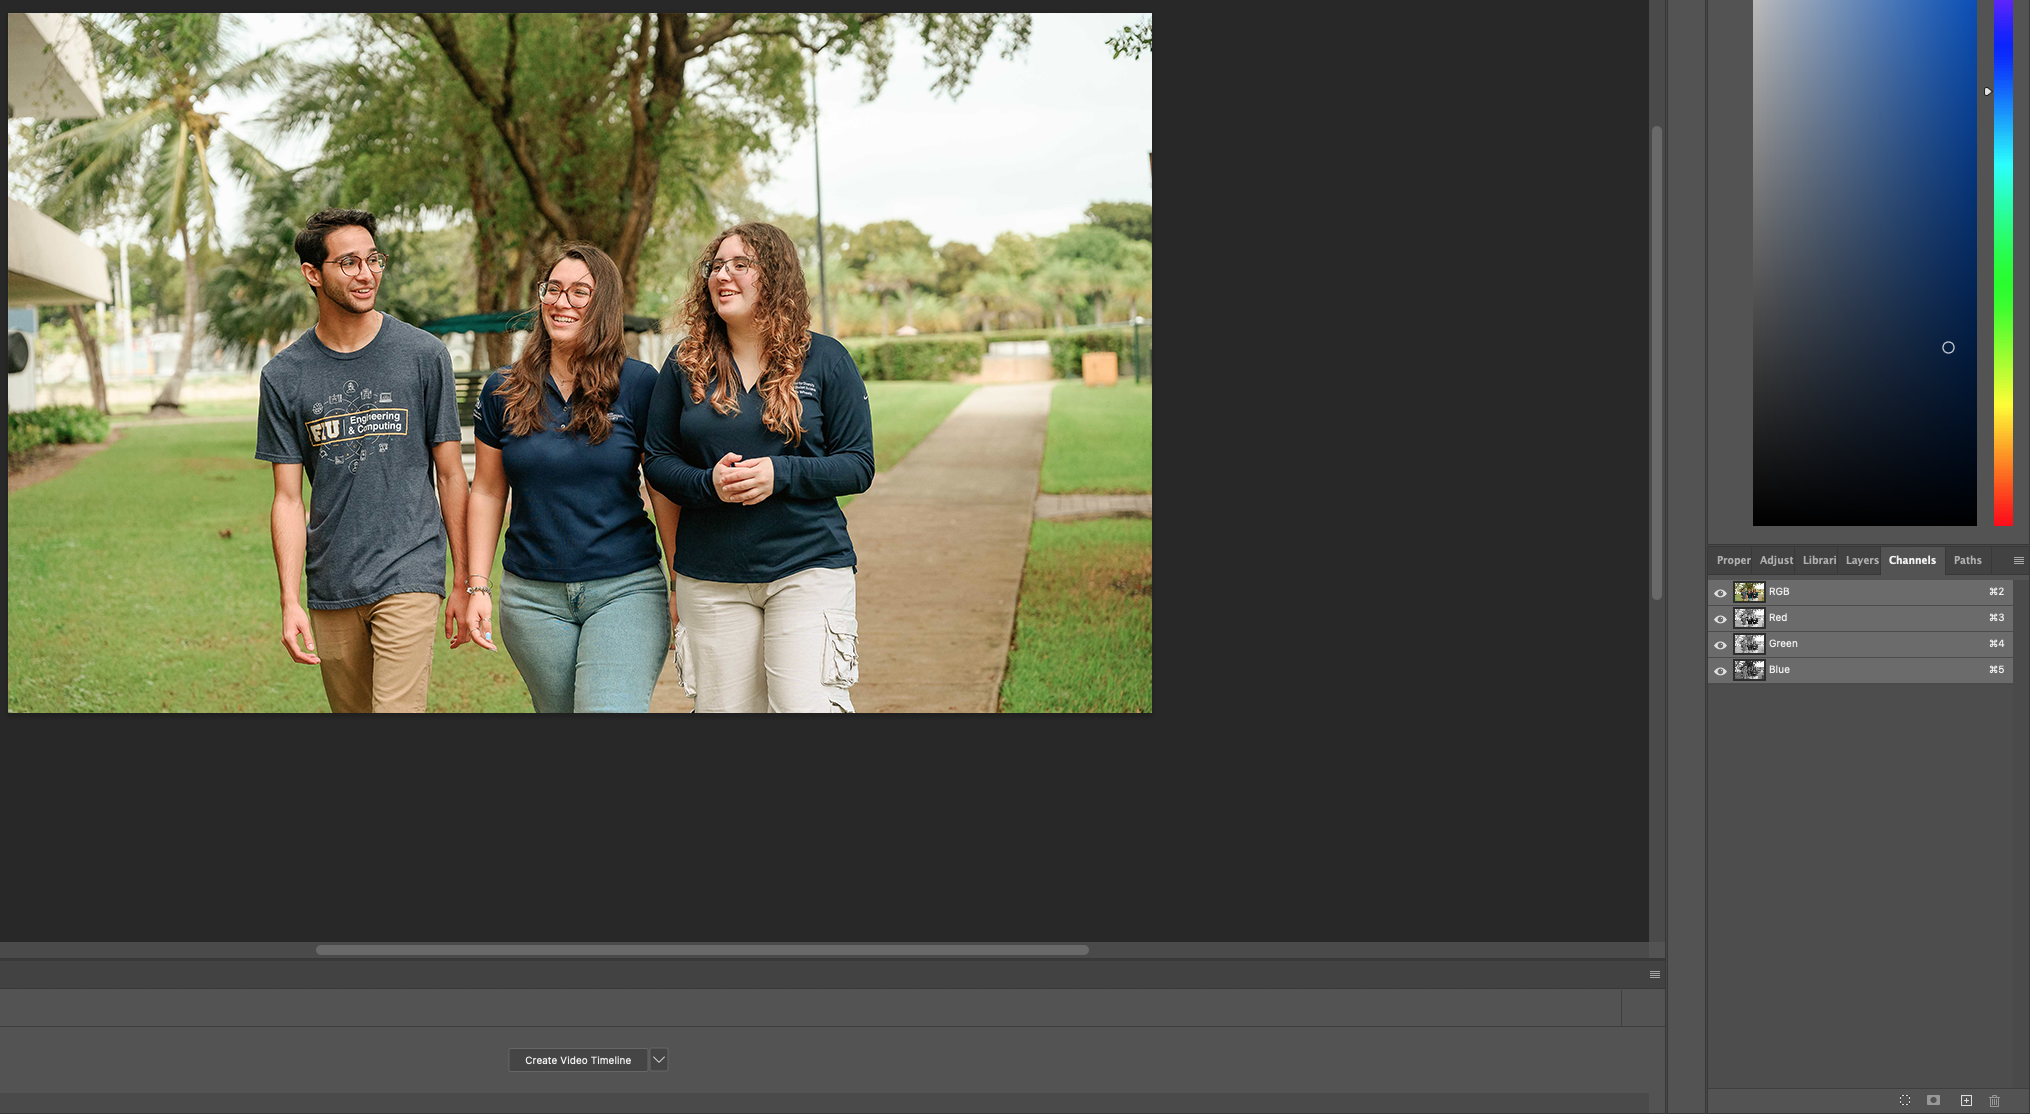
You will see four color sections to your left: RGB / Red / Green / Blue.
Decide on the channel that gives you the highest contrast and looks like the final image you envision.
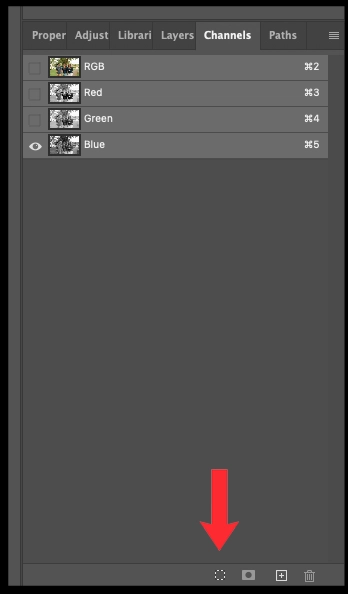
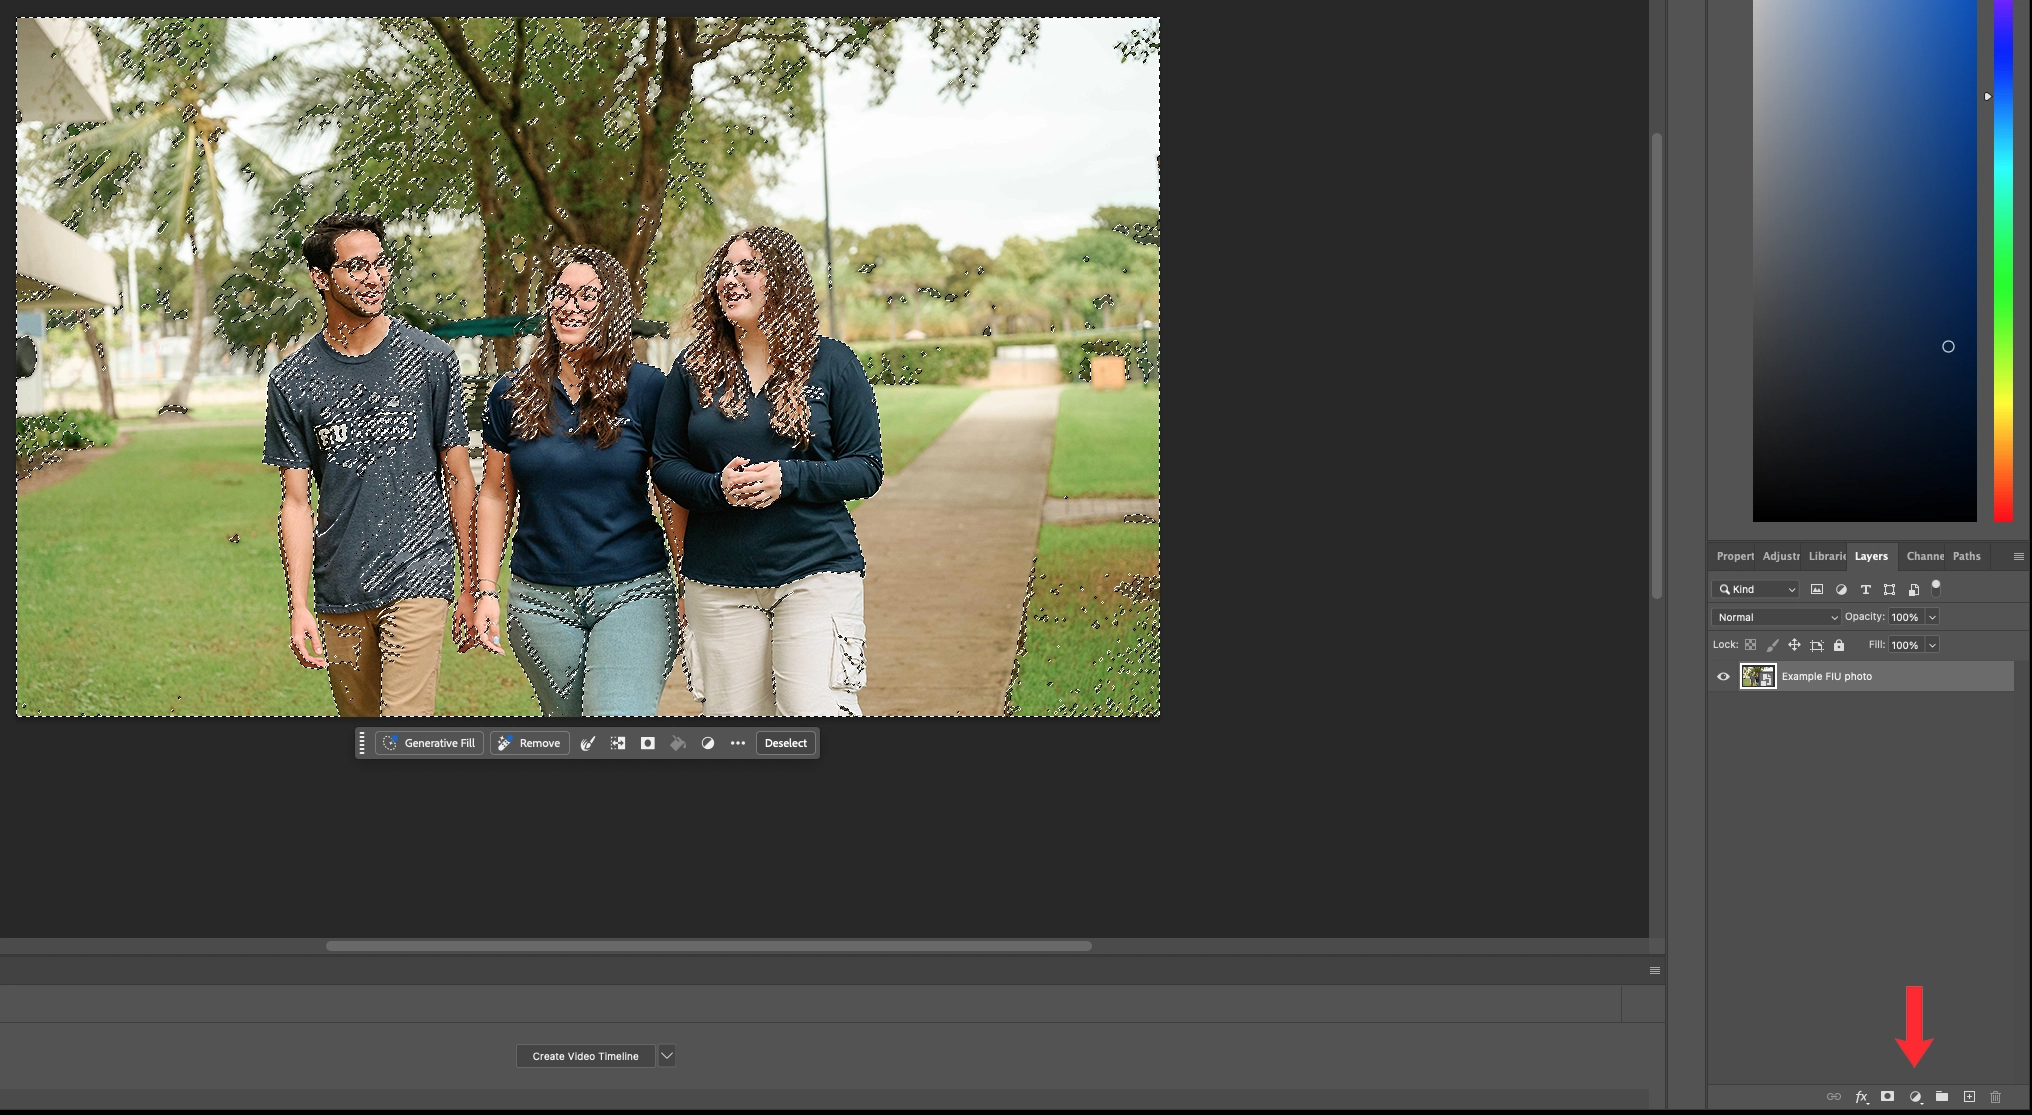
Then choose one color layer in the Channels panel and click the Load channel as selection icon.
Step 3
After selecting the Load channel as selection icon, return to the layers panel and select the icon to use a solid color fill. This is when you choose a light color.
Right-click the icon for adjustment layers and select Solid Color. Using our earlier example, let’s choose white.
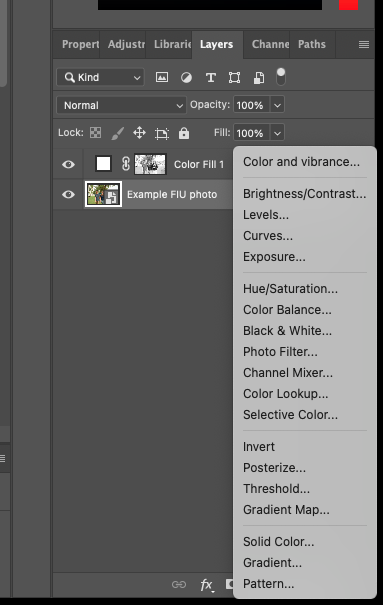
White is the ideal color we use for FIU branding purposes.
Step 4
Now it’s time to add FIU branding colors.
Select the original image, then right-click the icon for adjustment layers and select Solid Color and use FIU Blue: #081E3F.
Now, you have your duotone image.

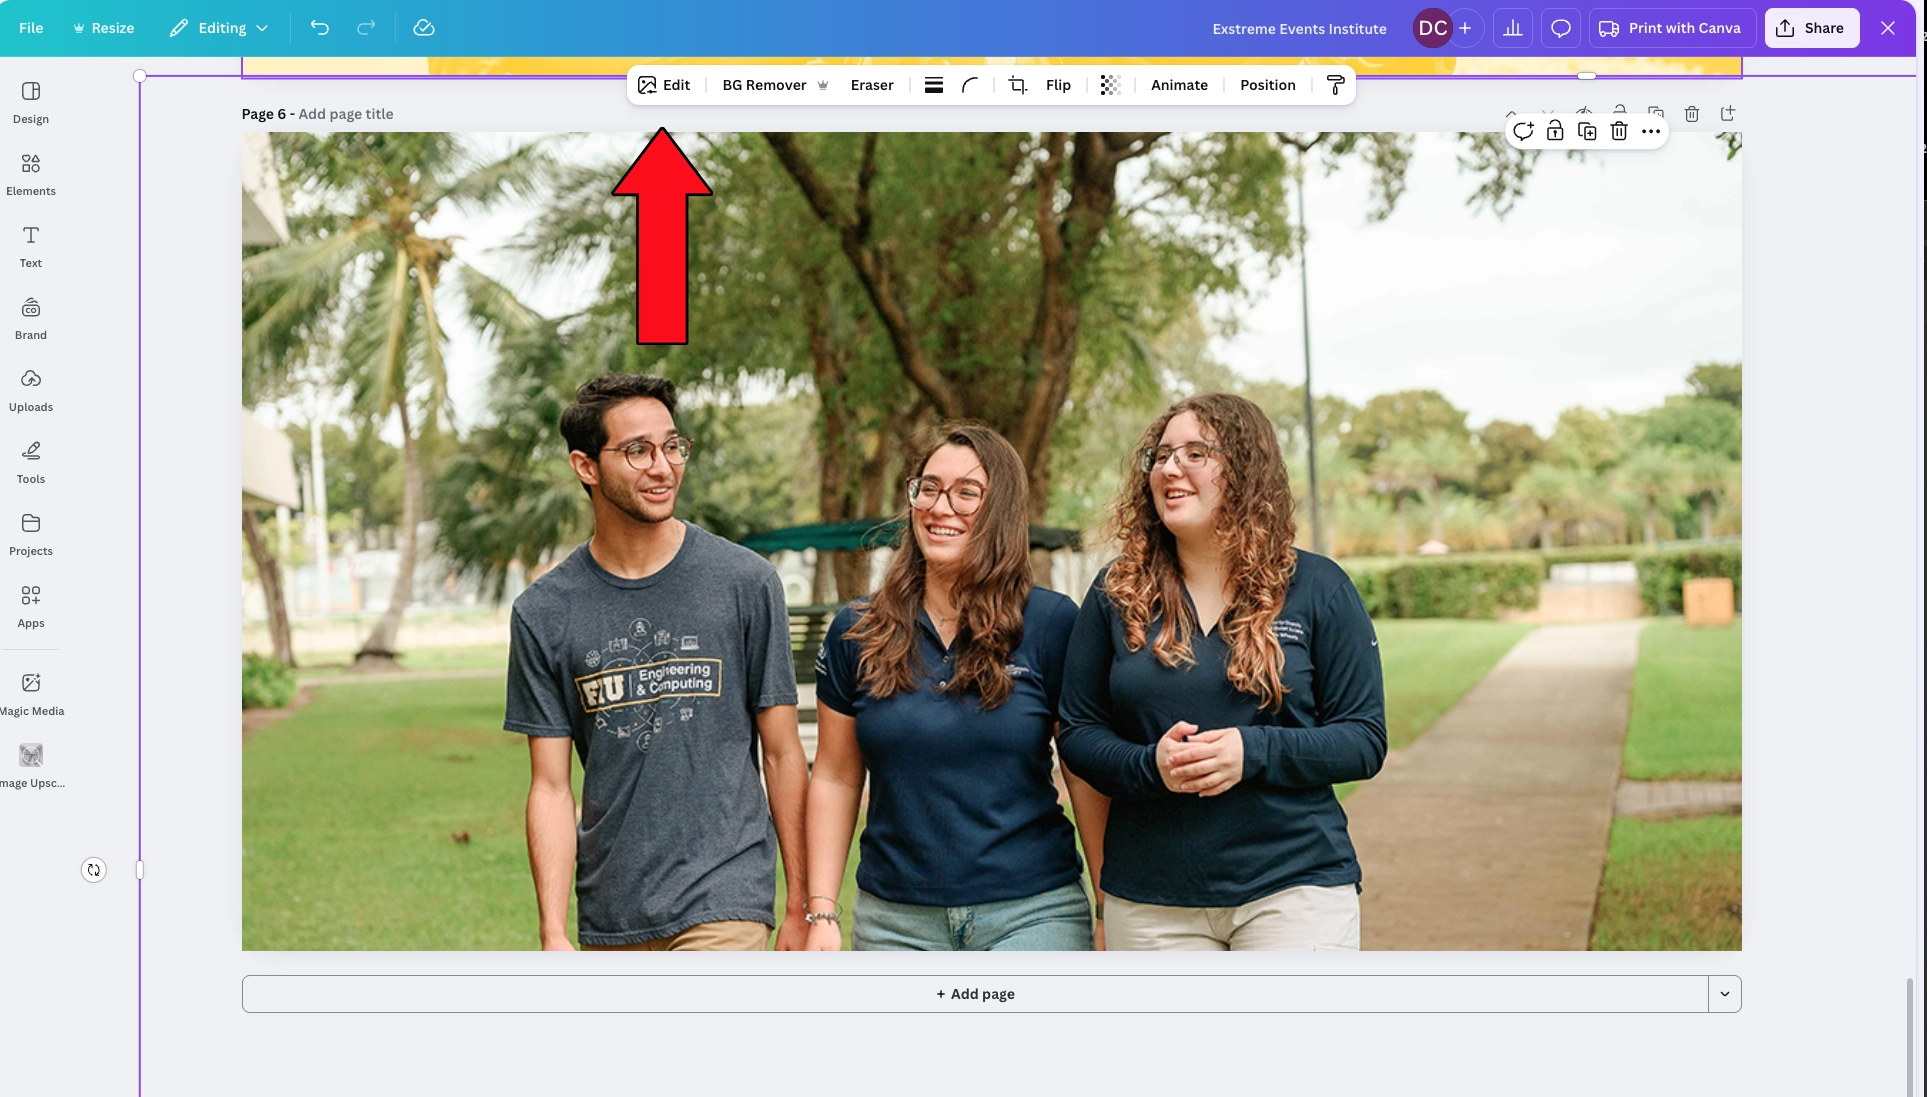
Making a Duotone Image with Canva
Using Canva, you can drop your image into the canvas. Hover over the image and select Edit.
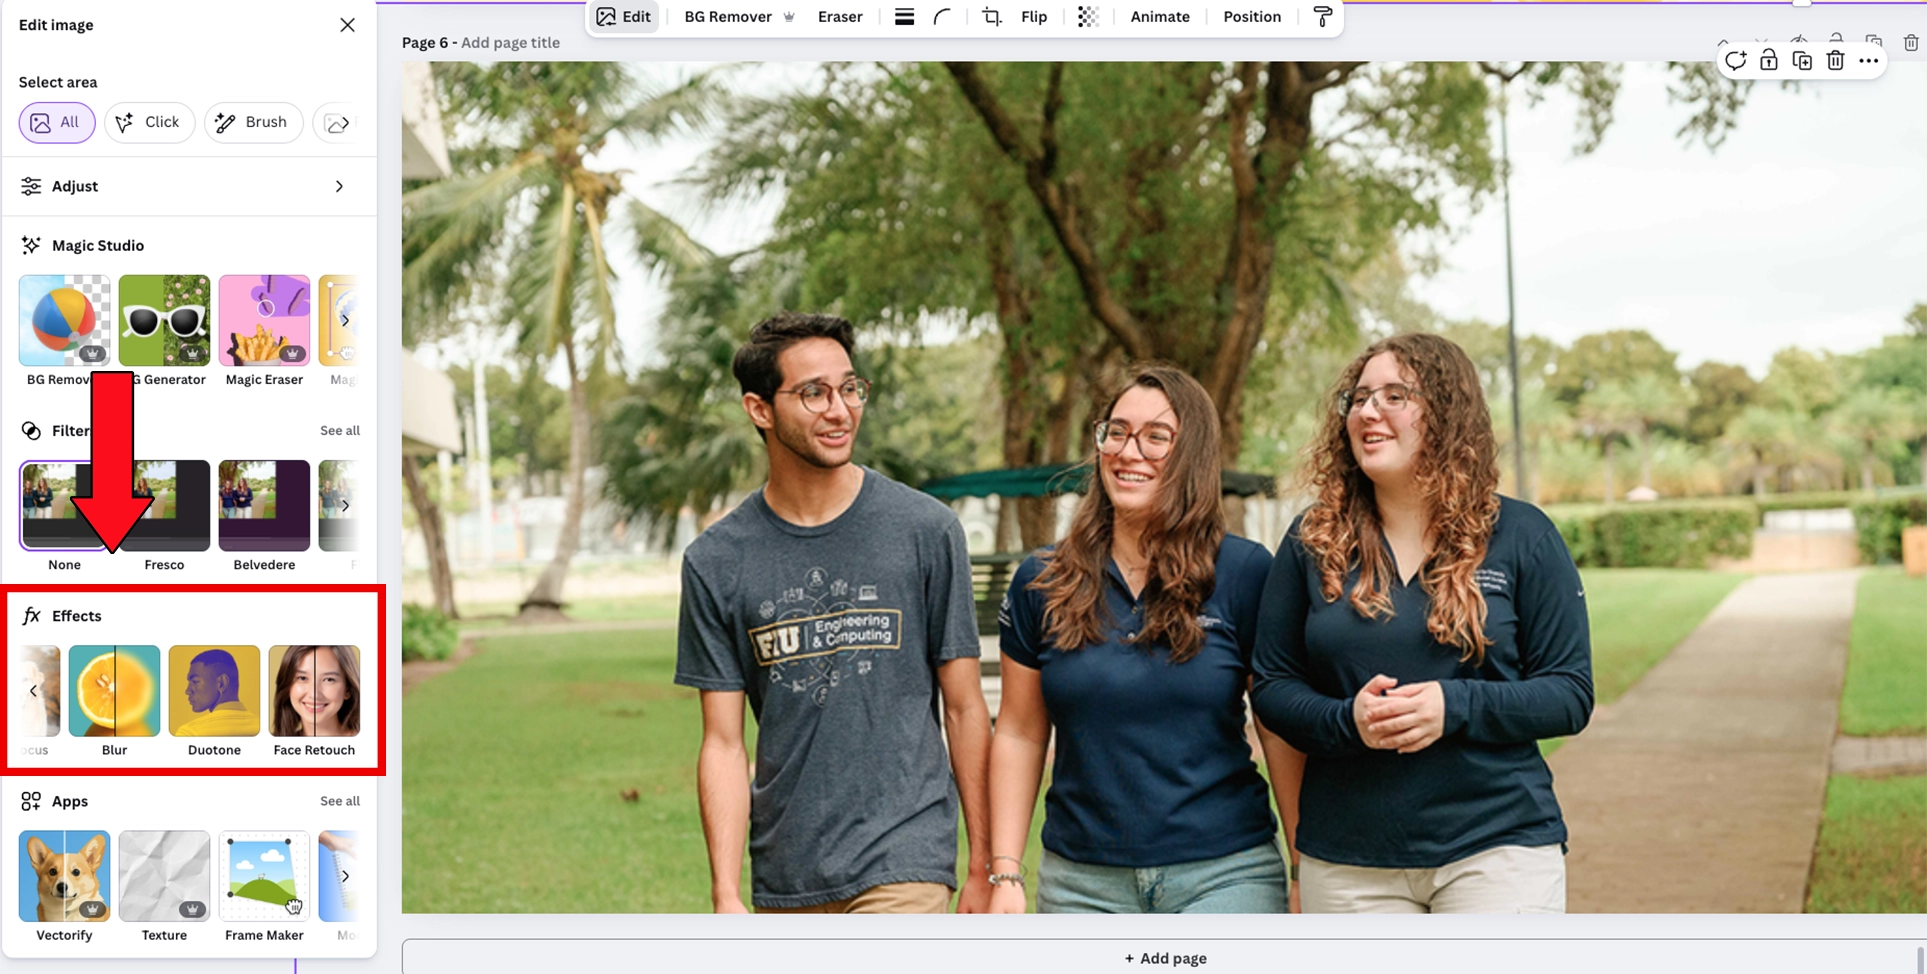
With the Effects panel on the left, you can select Duotone. Then, just use the colors mentioned in our tutorial (like white and FIU Blue) so you are compliant with brand best practices.
Conclusion
Duotone imagery is a simple yet powerful technique for creating visually engaging graphics that keep text legible while maintaining strong brand presence. Use this to your advantage in your design!