Core's profile feature offers a neat, organized way of showing the human touch behind your department's vital work. It lets you provide contact information more personally than a bulleted list and more concisely than a row of content blocks.
Step 1: Create a profiles folder
The first thing you need to do is create a folder where your profiles will be stored. If your website already has a profile folder, you can skip to Step 2.
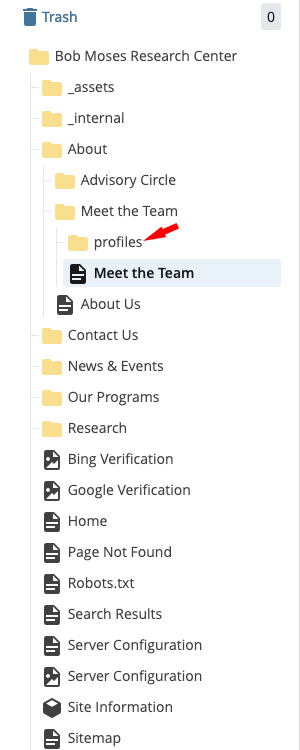
The best place for this folder is within the directory where you want your profiles displayed. For example, the Bob Moses Research Center has their folder within their Meet the Team directory.
Click Add Content and select Folder. Be sure to check Yes for the "Is this a profiles or blog year folder?" box.

Step 2: Create a profile
Now that you have somewhere to place your profiles, it's time to create one. Click the Add Content button in the top-left corner of Cascade, select Profile and then Profile Page.
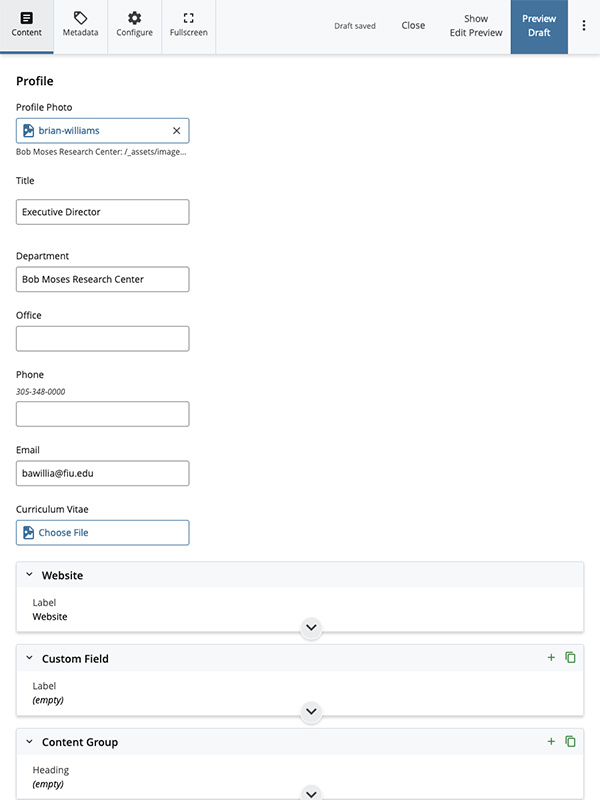
Fill in the fields with as much of the profilee's information as you want to include, from their title to their curriculum vitae. At a minimum, we recommend including a:
- Name
- Headshot (a square image around 500x500 is ideal)
- Title
- Email (strongly recommend an fiu.edu email)
Remember to use Content Group for text (like a bio) you want to display on the profile page, not the Summary field at the top which is used for meta descriptions.
Please note that FIU's Digital Communications Standards require all university websites to have at least one name and e-mail address to serve as a point of contact.

Step 3: Link your profile
Make sure to link to your profile on your website so users can access the page. Users visiting your profile page can read your bio, download your CV and much more depending on what fields you filled out when creating the profile.
If your information ever changes, all you have to do is go to your profile folder, edit your profile and republish.

Step 4: Show off your profile by creating a Profiles module
If you want to do more than just link to your profile on your website, consider using our profile module.
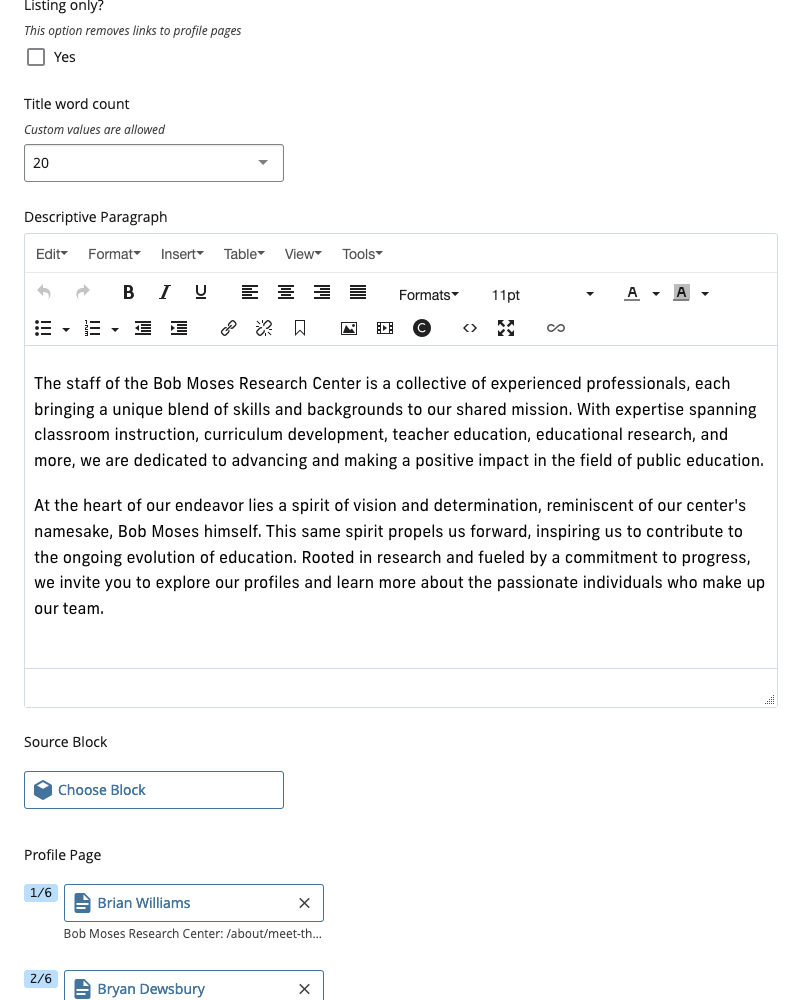
To start, create a new module, select Lists and Feeds, then click Profiles.
You can customize the module with features like a descriptive paragraph or profile images. You can also check the Listing Only box if you don't want any hyperlinks in your profile module.
Then, go to the Profile Page section and click Choose Page to select the profile(s) you want to display from your Profiles folder.

Hit Publish and you're all done! You should now see your brand-new module with all the included profiles arranged into rows.

More ways to display your profile
Now that you have basic profiles set up, you can use them to implement a searchable interface or profile block. Be on the lookout for future blog posts on how you can better organize and display your profile pages using those complex features.
Or, if you're already interested, contact us at digimaint@fiu.edu so we can help you set up more ways to show off your department's new face.
