If you're looking to convert your forms from a simple set of fields to something more advanced, you'll find the Logic Builder built in to FIU Webforms can help you create rules to show or hide fields, send custom email responses or route users to custom pages—all based on user selections.
You can access the Logic Builder by clicking on the Logic icon below your form.
![]()
Within the Logic Builder, you'll see the option categories where you can create and modify rules for your form:
- Logic to Show/Hide Fields
- Logic to Skip Pages
- Logic to Send Notification Emails
- Logic to Send Form Data to Another Website
- Logic to Display Success Page

1. Logic to Show/Hide Fields
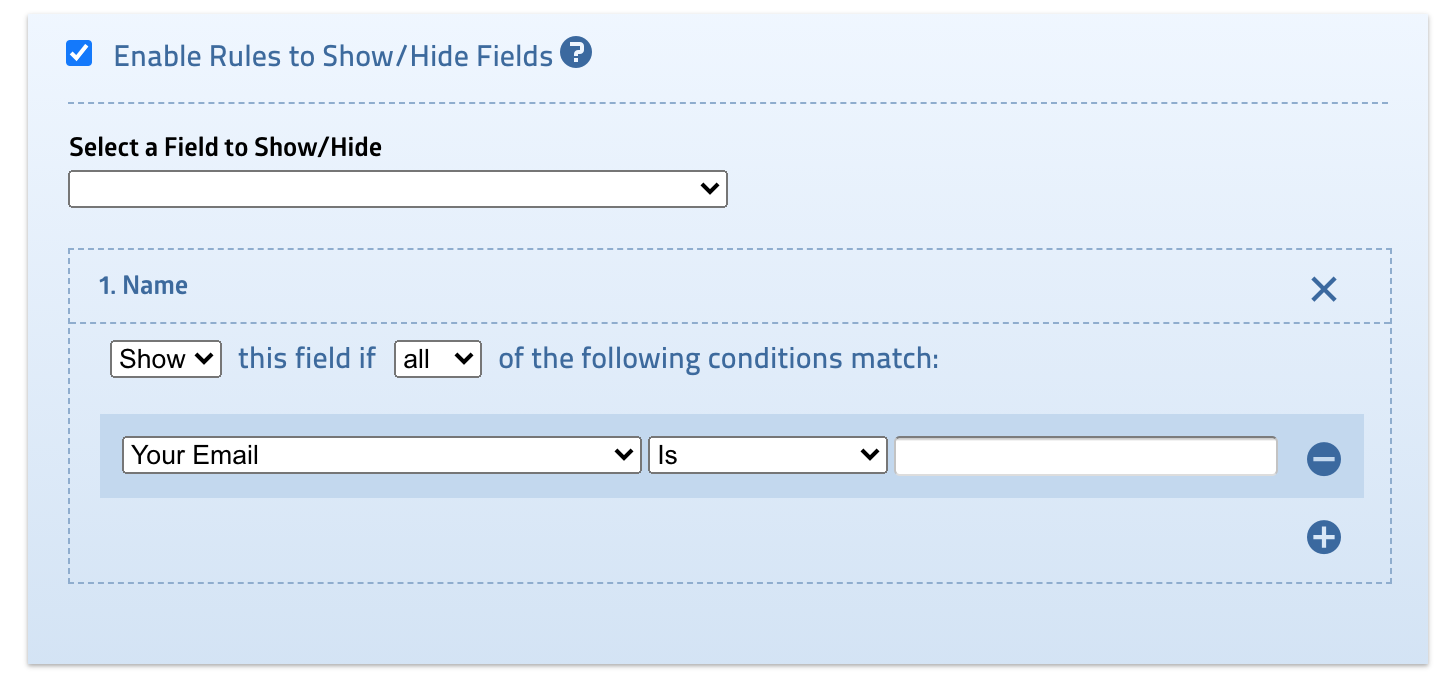
This logic allows for the showing or hiding of certain fields on a form based on the selection made in another field. It provides the ability to present various fields based on user choices.
Consider a form that includes an "Other" option within one of its fields. When the user selects this option, a new field appears allowing them to expand on their selection.
2. Logic to Skip Pages
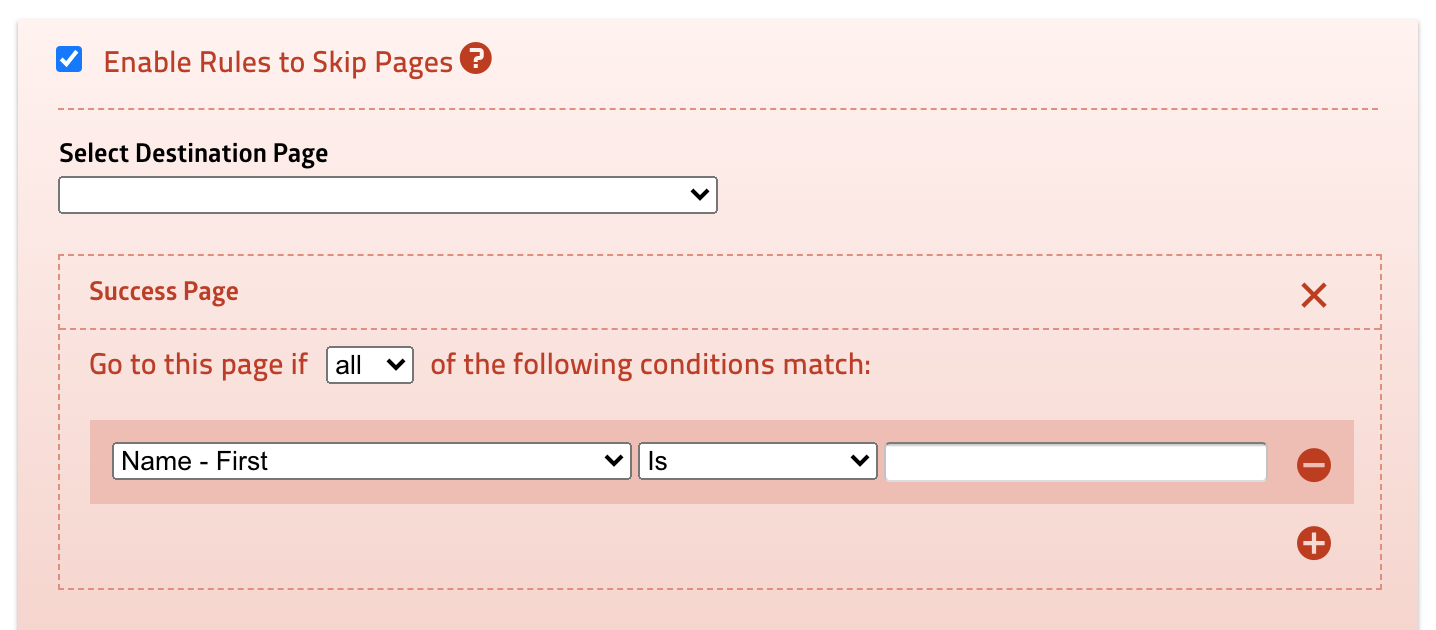
To improve user experience, larger forms can be divided into multiple pages. This feature provides the ability to skip certain pages based on user preferences.
Have you ever registered for an event and been asked to choose a department?
If the different department event sections are split into separate pages, you can utilize the Skip Pages feature to jump directly to the page that corresponds with your selected department. This can save time and streamline the registration process for attendees.
3. Logic to Send Notification Emails
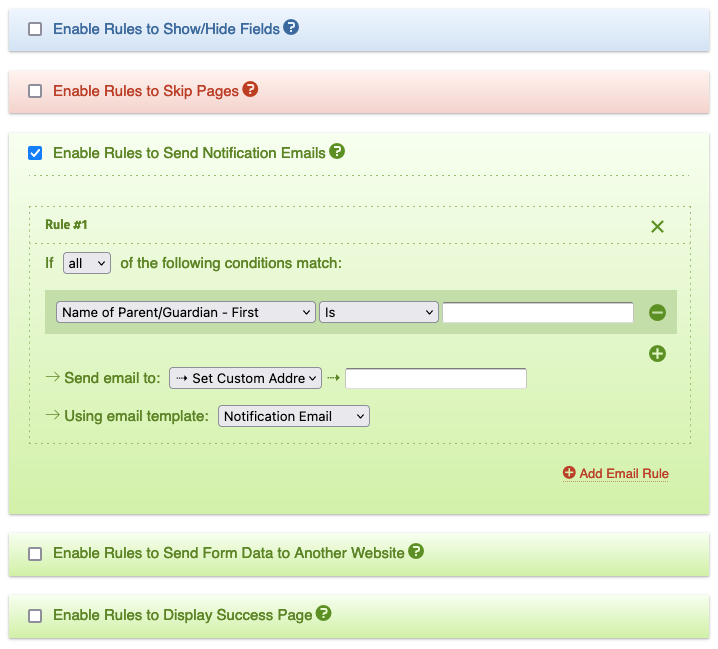
Enabling this logic allows the form to send emails to multiple email addresses, each with its own subject and content. The form can also generate diverse receipt emails based on information collected from the form.
An example for this is sending an automated email to a user when they opt in for more information using a checkbox system. Another example might be a contact form that alerts different departments based on whether a user selects one option or another as the reason for submitting the form.
4. Logic to Send Form Data to Another Website
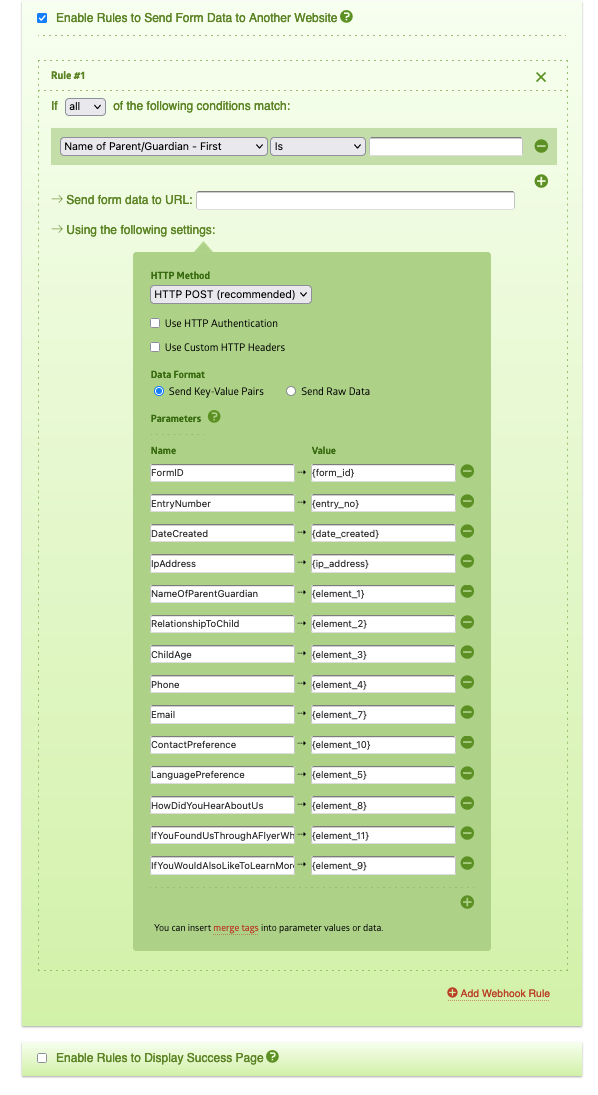
This logic can be integrated in your form with another service, such as MailChimp, CampaignMonitor or any other website that supports HTTP API.
For example, if a user opts into a newsletter from a contact form, the user's name and email can be sent directly to a MailChimp subscription list you manage.
This option is only for advanced users. Checking this option is a common reason why your form might take you to a broken page.
5. Logic to Display Success Page
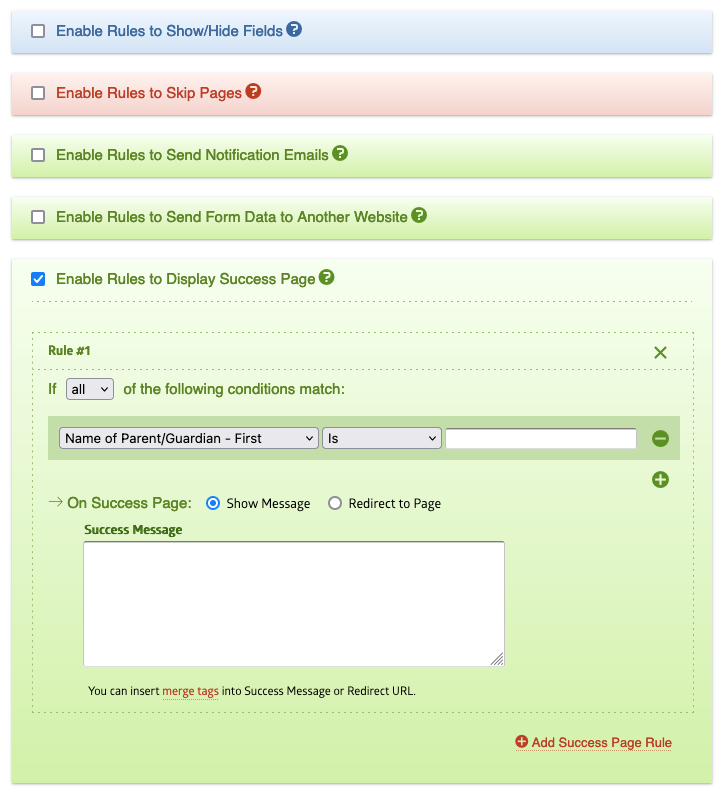
By utilizing this logic, you can redirect users to a different URL or display a distinct message on your form's success page based on their selection.
One way to use this technique is to show a personalized message after a registration form is completed for an event/program. Another way is to redirect users who are interested in a specific program to a message on that program's page.
Some quick reminders about Webforms
- Webforms is self-service. DigiComm is here to help, but we typically do not debug individual forms.
- If you're interested in creating a form and need help from the Office of Digital Communications for making your form successful, you can start a project with the DigiComm team. Make sure to describe the project in detail and select “Website – New Feature” as the service.
- General issues can be sent to digimaint@fiu.edu