Creating a New Page
- Click Add Content at the top left of the page.
- In the dropdown, select Page.
- Select a Placement Folder to designate the page’s location. Each page in a site is saved inside a folder to create a site hierarchy. When you have found the right placement folder for the new page, click Choose at the top right.
- Input the page title into the Display Name.
- Click submit. This will create a new folder and a file of the same Display Name. The file inside the folder is your new blank page inside that folder.
- Edit this file to begin editing the page.
Tip: Page names are derived from two different sources. In the picture below, 1 is assigned by the Display Name of the page folder, and 2 is set by the Display Name of the page file.
To change a page title, you should edit both the page folder and the file.
Editing a Page
- To find the page you’re going to edit, locate it in the list of folders on the left side of the screen.
- Expand the folder by clicking it and selecting the corresponding file inside.
- Click Edit (located in the top right of the screen) to open the editing window.
*See the next step (Structuring Page Content) for instructions on making complex edits to the page layout. - When you’re done editing, click Preview Draft (located at the top of the editing window). If you are not satisfied with your changes, click Edit again to reopen the editing window. You can also Discard your changes from this page.
- If you’re satisfied with your changes, click Submit (located in the top right corner of the editing window).
*You’ll be prompted to either Submit or Check Content and Submit. The second option will check for typos, broken links and accessibility issues. - When you’re ready to make your changes live, click Publish.
Tip: When editing in Cascade always Submit and then Publish. Unsubmitted drafts in Cascade may be overwritten by other Cascade users. Submitted, but not published drafts will be published routinely overnight. It is strongly advised that you do not leave half-finished or draft pages in Cascade.
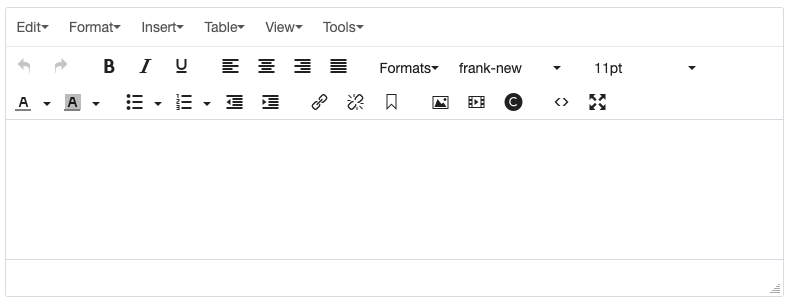
Using the WYSIWYG
The WYSIWYG lets you freely edit the formatting of any element you want on the page. With a bit of HTML knowledge, you can use the WYSIWYG to create anything you like on the page, from images to charts and videos. This will be the primary way you put content on your page.
Using the WYSIWYG is like editing text in a Word document. Further instructions can be found in this document. See instructions for:
- Creating links
- Uploading page assets
- Inserting an image
- Inserting a video
- Inserting forms
Using Headings
Headings are used to organize the content on a page. Headings are numbered one through six and ranked by importance from smallest to largest.
The most important heading, the H1, is automatically created by filling out the Display Name. The other headings, H2-H6, are used to start a new section and are nested by level.
| Do | Don't |
|---|---|
<h2> <h3> <h4> <h2> | <h2> <h4> <h6> <h3> |
Headings must be used in this way to meet accessibility requirements. They make the page a lot easier to read and increase visibility on search engines. Learn more about headings.
Using Content Areas
Every element on a page is composed of different content areas. Content areas are grouped into different types:
- Calls to action (CTAs) – Use CTAs for targeted actions you want your user to do. CTAs are a powerful way to get the user’s attention, but you should use them sparingly to prevent them from losing their effectiveness. As the name implies, a CTA should be actions such as Sign up, Apply or Submit.
- Content blocks – Content blocks are the most frequently used content areas. You can put almost anything you need in a content block. Use them to break up content into one, two or three columns of varying size. They can also be used for more complex designs such as collapsible accordions or tabs to hide or show content.
- Design elements – Design elements are more stylized content areas that can be used to highlight important facts or quotes. Custom formatting is limited in these content areas.
- Featured content – Featured content is used to break up content into categories and link to other pages. These can be useful for a page that leads a user to a set of subpages. By providing a small summary of all subpages, the user can understand what’s there without clicking on every page.
- Lists and feeds – Lists and feeds can pull from your site’s staff directory, a news feed from FIU News or a calendar feed from the FIU Calendar.
Creating Links to Assets, Other Pages or Other Sites
- While editing a page, highlight the text you want to link. If you are editing an existing link, click anywhere on the linked text. Then click Insert/Edit Link to open the dialog box.
- For links to pages within the site, select the Internal check box. Find the page or assets you want to link to in the flyout by searching the whole site under Browse.
- For links to other sites, select the External check box and enter the full URL of the link.
- For external links, links to PDFs and links to other documents, select the Target dropdown and click New Window.
- For anchor links, use the Anchor Add anchors as they appear after the # symbol.
- Click OK to finish.
Tip: For text links, avoid using Click here or Learn more. Links text should be as descriptive as possible. Instead of writing “click here to download our brochure,” write “to find out more, download our brochure.”
Uploading Page Assets (Images, Documents, Etc.)
All assets are required to be accessible for impaired users by the FIU Digital Policy and by standards set by the Americans with Disabilities Act. Follow these accessibility guidelines to learn how to make your documents accessible and follow the instructions below to learn how to make images accessible.
- Upload images in the dimensions they will be displayed on the site (use sites like Pixlr to edit photos). Compress images so that they load faster on your site (use apps like JPEGmini to compress photos).
- Click the Add Content button and select Default > File.
- Select a Placement Folder for the file. All files should be saved to the _assets. Inside _assets, select the appropriate folder (save images to the images folder, PDFs to docs, etc.). If necessary, you can create a new folder inside _assets by clicking Add Content > Folder. Saving assets to the correct location is important when you need to edit them in the future.
- Upload the file.
- Click Preview Draft to review the image upload and then click the Submit button.
Note: Uploaded images should be in the closest size possible to the size you want them to appear on your page. Do not upload huge images to Cascade and then shrink them. This causes your site to load slower. Make sure you include the file extension when giving your file a System Name (ex: image .jpg or document .doc or brochure .pdf).
Inserting an Image
- While editing a page in the WYSIWYG, place the cursor where you want to insert the image.
- Click the Insert/Edit Image icon.
- In the pop-up window, select Choose File. In the flyout, you can search all uploaded assets in Browse. If you have not uploaded the image, you must return to Upload Page Assets steps above.
- If the photo contains text or requires a description (like a logo or an infographic), you must fill out the Image description. If the photo is purely decorative, select the checkbox just above this field. This is required for ADA compliance.
- Click Preview Draft to review image positioning on the page. Submit and publish when you are finished.
- See instructions for Editing/Replace Page Assets if you ever need to change this image.
Inserting a Video
- Get the video embed code from YouTube or Vimeo.
- Find the page you want to place the video in and edit it.
- In the content editor, select the Source code icon.
- Paste the following code in the desired line on the page:
<div class="flex-video widescreen vimeo">
Video embed code goes here< /div> - Replace the red text with the video embed code.
- Click Preview Draft to review the video position on the page**. Submit and publish when you are finished.
Tip: Use content areas to your advantage. If you need to place two or three assets side by side, use a two or three-column content area.
Inserting Forms
- Copy the form embed code (you can create a form online using FIU Webforms).
- Find the page you want to place the form in and edit it.
- In the content editor, select the Source code icon.
- Paste the code in the desired line of the page.
- Click Preview Draft to review form positioning on the page. Submit and publish when you are finished.
Editing/Replacing Page Assets (Images, Documents, Etc.)
- Go to the location the asset was saved in. Most assets should be saved under the _assets.
*If you can’t locate the asset, return to the page where the asset is used. Inside the editing window, locate the asset, click on the asset, and try to edit it. This should show you where the asset is saved on the site. - When you find the asset in its saved location, select it and click Edit.
- Upload the revised file from your computer.
- Click Preview Draft and then Submit.
- The new asset will be updated on whichever pages it is used. Return to that page and click Publish to make your changes live.
Adding a Feed
An RSS feed is a way to pull content published on another website into your own website, automatically.
More Info From Cascade
Things to Remember
To change the order of the left navigation items, click the folder they are housed in and use the up/down arrows to re-order them.