
There are lots of options for displaying photos in Cascade, but, until now, there were only a couple of options for displaying multiple photos.
As of Core v1.43, users can create a simple photo gallery between lines of content. The new inline photo gallery has the added bonus of click-to-enlarge functionality.


Try clicking on the photos above and toggling through the gallery. We'll quickly go through the simple steps so you can easily create your own inline photo gallery within Cascade.
Step 1: Create an Unordered List
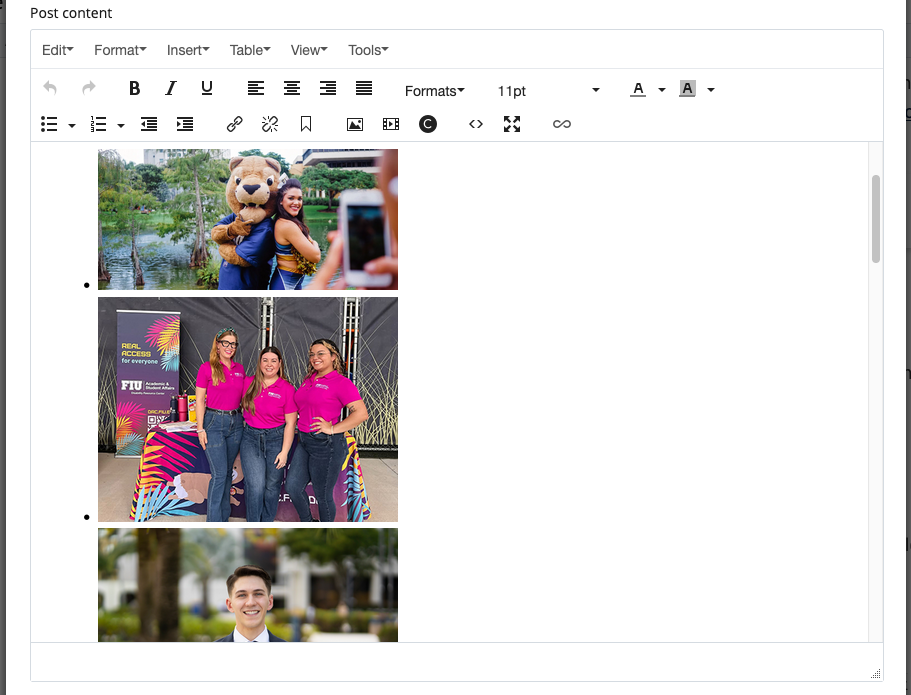
To begin, we will create an unordered or bullet point list. For simplicity's sake, we'll do this solely in the text editor. Click the bullet list icon to start.

We will use three bullet points for this example, so hit enter twice after the first bullet point is created.
Step 2: Insert Images
Next we will insert an image into each of the bullet points we created. You can insert images or media within the module with the image icon. Remember, all images you include must have alt text to be accessible.

Once you've inserted the list, it should look like a typical bulleted list with images for each bullet.
Step 3: Add class="inline-gallery"
Now that we have three images, one for each bullet point, we can get into the final step. Go into the HTML view, where you will see a <ul> at the start of your unordered list. We are going to add a class="inline-gallery" so that it becomes an inline photo gallery. After it's edited, it should look like <ul class="inline-gallery">.
Now let's take a look at the HTML view to see a rendering of the inline photo gallery from the beginning of the post.
<ul class="inline-gallery">
<li><img src="/blog/_assets/blog-images/best-practices-captions.jpg" alt="A cheerleader for FIU standing back to back with Roary the FIU mascot" width="1440" height="676" class="" /></li>
<li><img src="/blog/_assets/blog-images/drc-staff-tabling.jpg" alt="The staff of the Disability Resource Centers standing together" width="400" height="300" class="" /></li>
<li><img src="/blog/_assets/blog-images/headshots-best-practices-blog-thumbnail.jpg" alt="A headshot of an FIU employee" width="1200" height="800" class="" /></li></ul>
Formatting Your Images
Thankfully, you don't need to format each image to a specific size for it to appear correctly in the gallery. The gallery will display as square thumbnails and images will expand to their actual size once viewed within the gallery. It can be helpful to set your images to 300px wide in the editor, just to make it easier to review within Cascade.
Remember to optimize your images. Images should always be less than 1MB in file size and generally smaller than 1600px wide or 800px tall.
While there is no limit to the number of photos you can add to this type of gallery, we recommend using at least three images and trying to stick to multiples of three. We wouldn't add more than nine photos to an inline gallery.
Use Cases
Here are some ideal use cases for the new inline photo gallery:
- Posting event photos
- Providing multiple angles of an object
- Showcasing an event space
- Featuring an array of objects
If you have any questions about this new feature or run into a bug, please send us an email at digimaint@fiu.edu. We’re always happy to help!